The Records Manager allows the user to associate a variety of documents to a patient’s file. This is particularly useful when test results are returned or you have scanned the patient’s records and want to make the documents available to the physician.
After logging in to the Records Manager module, you will see the Records Manager Home Page, shown below. This page contains two headers, Tasks and Communications. In this section, we will focus on the Tasks portion of the page.
Messages are covered in the Docpad Reference Guide. Pertexa Support links to the main support page for Pertexa clients.
The Tasks section includes the following features for dealing with scanned documents, managing notes, and filing test results. Tasks in red show when there are items to be managed.
- Create Documents: Allows the user to transfer documents to specific patient charts.
- Past Notes: Allows the user to see different types of notes associated with a particular patient.
- Attach Documents:
- Rejected Documents: Shows documents the physician has rejected as not associated with that patient.
- Unlinked Test Results: Displays a list of results that need to be associated with a patient and sent to their file.
Like most of Pertexa, there are several buttons on the top right banner:
![]()
- Upload Manager: Lets the user upload documents into Pertexa.
- Home: Takes the user back to the home section of Records Manager.
- Messages: Lets the user send and receive messages within the clinic.
- Logout (the lock): Logs the user out of Records Manager and back to the password login section.
Upload Manager #
Create Documents #
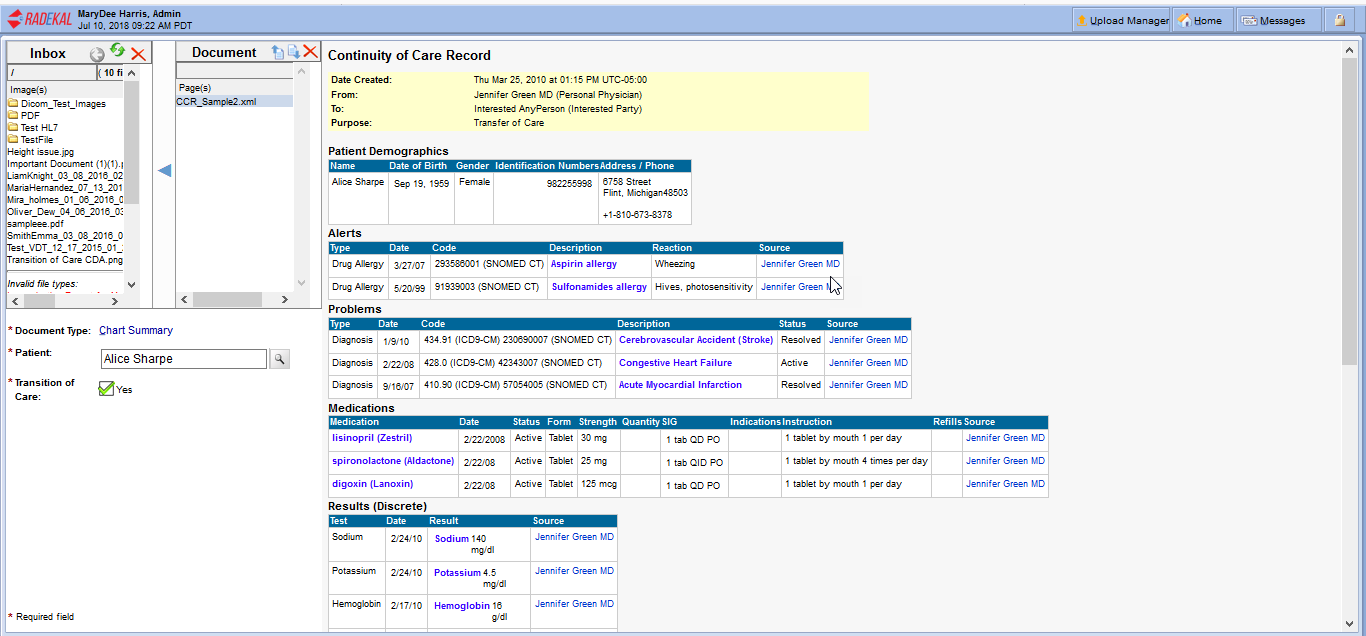
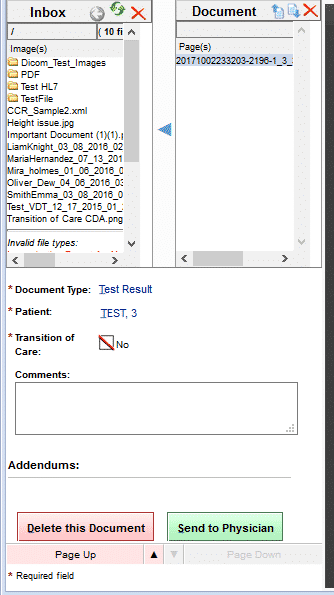
After clicking on Create Documents, the user will see this screen. This section is divided into 3 sections: Inbox, Document, and the Image screen. When you first start, the Image screen will be blank. The illustration below shows a Continuity of Care Record for a patient.
NOTE: Before beginning, make sure there’s a link to the Inbox. The setup instructions are given to the Administrator or IT personnel. This link will be on the user’s computer, on the Desktop screen.
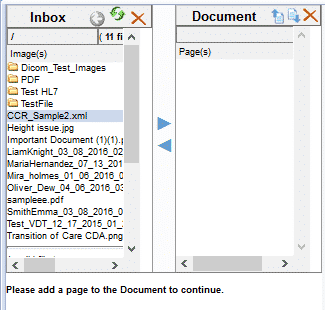
Inbox and Document: These two sections are used to transfer files from the users desktop to the Pertexa system. The user can have multiple directories in the Inbox. Files can be transferred to the Document section so they can be placed in a selected Document Type.
The blue arrows between the Input and Document boxes allow you to select a file for handling. For example, when you hit the right-pointing arrow, the file name selected in the Inbox will be shown in the Document box and its image will appear in the Image box to the right (not shown here). After a file has been handled, the name can be removed by clicking the left-pointing arrow to move it back to the Inbox.
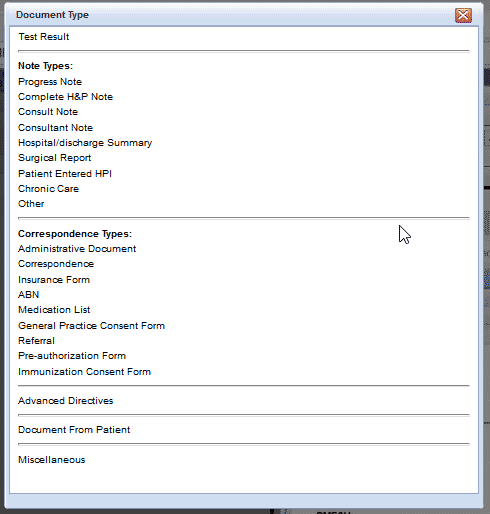
The Document Type is a pop up with a variety of selections. The user clicks one of the selections to associate the document to that type.
Once the user selects a Document Type, more blank fields begin to populate, depending on the type selected. These fields route the document to the proper location in the Pertexa system. Here’s an example of a Test Result document to be associated with the patient’s chart.
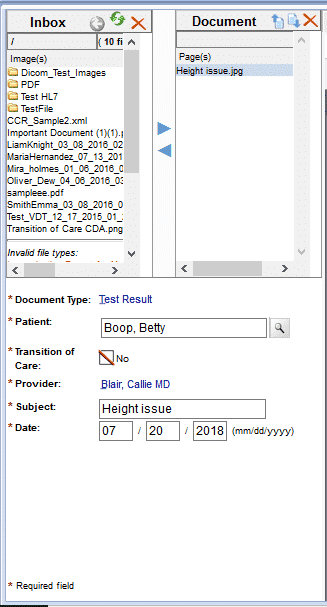
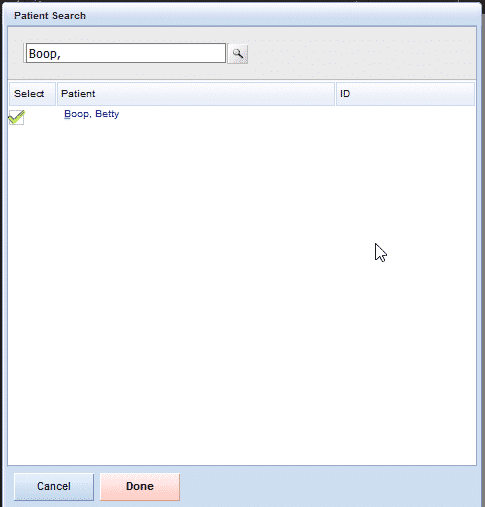
To link this test result with a patient, select the patient by typing in the name and clicking the Search (magnifying glass) icon. That brings up a patient search window with a list of patients for the name given (in this case only one). Select the one you want and click on the box to the left of the name.
When you click Done, there will be additional fields listed under the Inbox/Document boxes.
IMAGE 12
Now select the test ordered for this patient to make the link, add any appropriate comments, and click the Send to Physician button to create the link.
The Image section of the Create Document page shows the scanned document. The upper right corner has controls for how to see the document.
- Full Screen Window: expands the window to fill the users screen area.
- Rotate: turns the document clockwise 90 degrees every click
- Fit in Window: If the file is big, it reduces the proportion to fill in the designated viewing area.
- Zoom to Full Size: shows the document in its full size.
- Zoom In: expand the document
- Zoom Out: shrink the document
- Arrows: can move the document up, down, left, and right.

#
Past Notes #
Past Notes is set up to let the user see existing patient notes. These notes are specific to the patient being viewed. First you enter the patient’s name using Search, which gives you a list of past notes for that person.
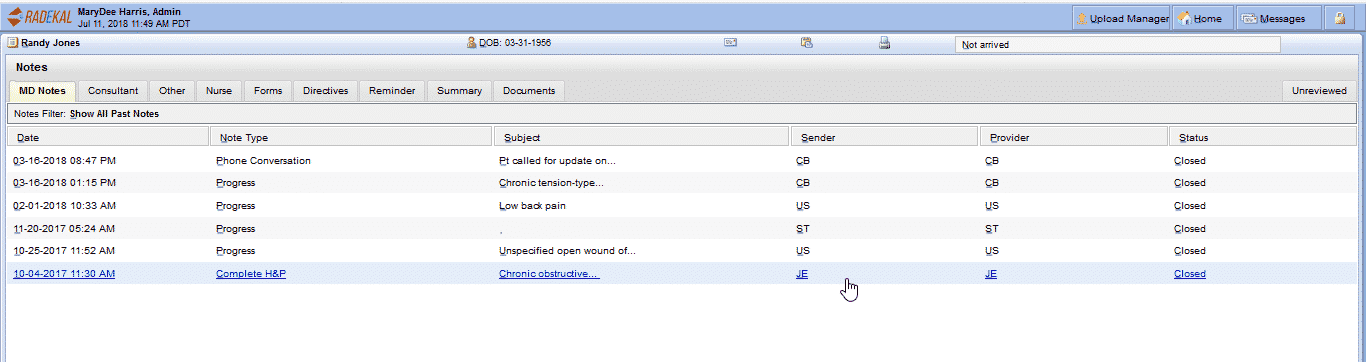
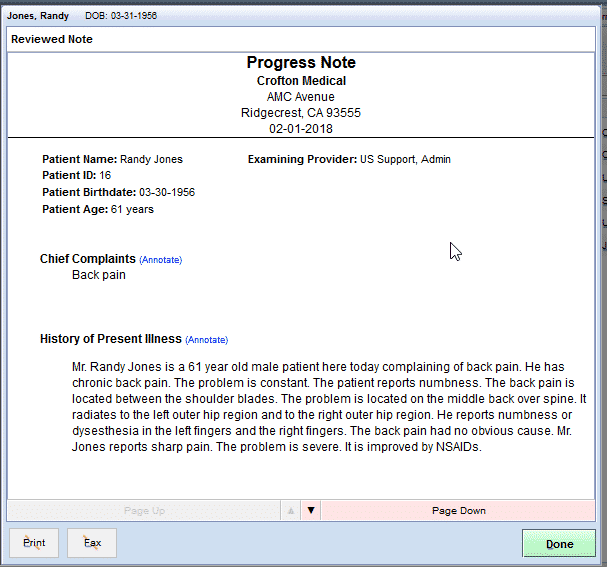
When you select a particular past note, it will be displayed and can be printed or downloaded or faxed.
#
Attach Documents #
Attach Documents gives the user another way to add documents to a patient’s chart. Once again you choose a patient to begin, using the search button and selecting the appropriate patient.
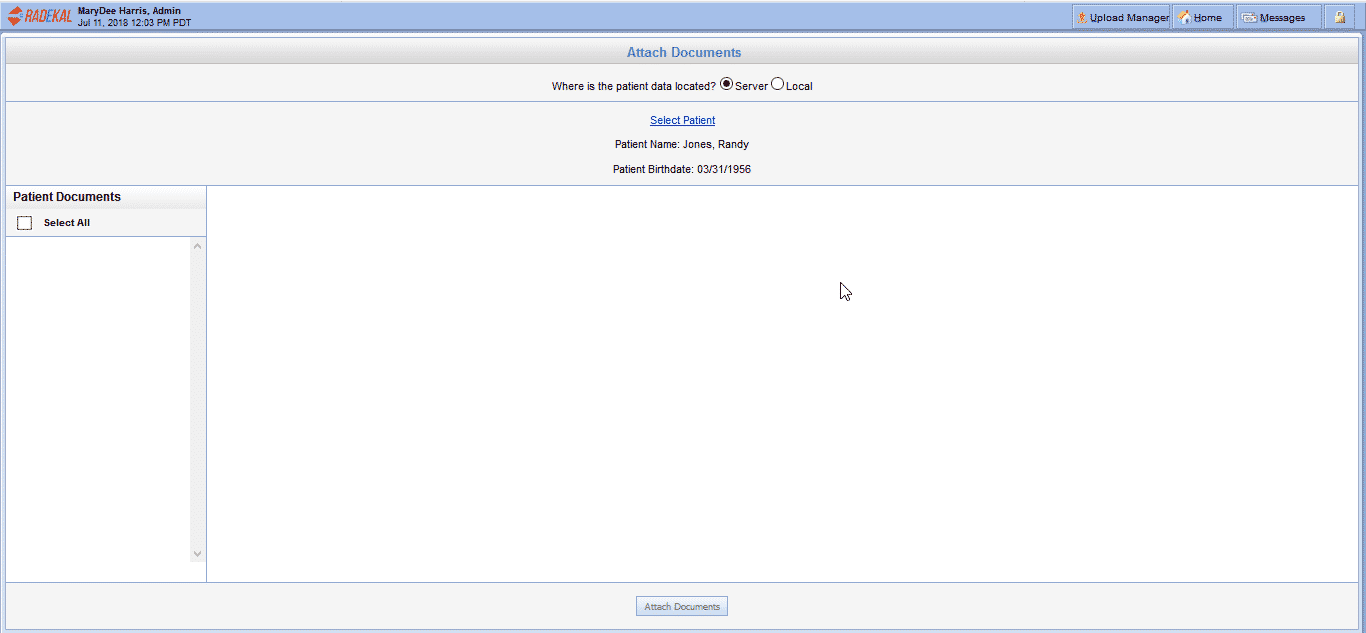
Notice the choice at the top: Server or Local. You choose where the document is located that you want to be attached.
Rejected Documents #
Rejected Documents (n) lists the test results or other documents that have been rejected by the provider for one reason or another. Most commonly a test result has been linked to the wrong patient and much be corrected. The item can be deleted from this page or selected for more options. (The ‘n’ in parentheses indicates the number of Rejected Documents.) If you do not see this option on the home page, then you have no Rejected Documents waiting to be corrected.

Selecting an item from the list returns the user to the Create Document page with an option to Delete the document entirely or to correct it by choosing the appropriate patient and the sending it back to the physician.
#
Unlinked Test Results #
Unlinked Test Results (n) is set up to link test results with a particular patient.
The patient’s results are listed on the left section of Pertexa. The user can search for a patient to send the test result to that patient’s chart. (The ‘n’ in parentheses indicates the number of Unlinked Test Results.)
The Unlinked Test Results page will display a list of all patients with unlink test results. You can also search for a patient by last name.
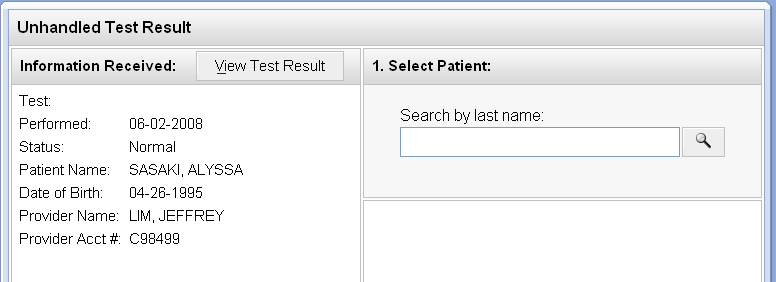
Selecting a patient and test result brings up a page with two sections. The left section contains two tabs: Information Received, View Test Result. The right section is Select Patient. The first tab, Information Received, shows the identifying information about the test and the patient.
View Test Result displays the test result for review.
Rejected Documents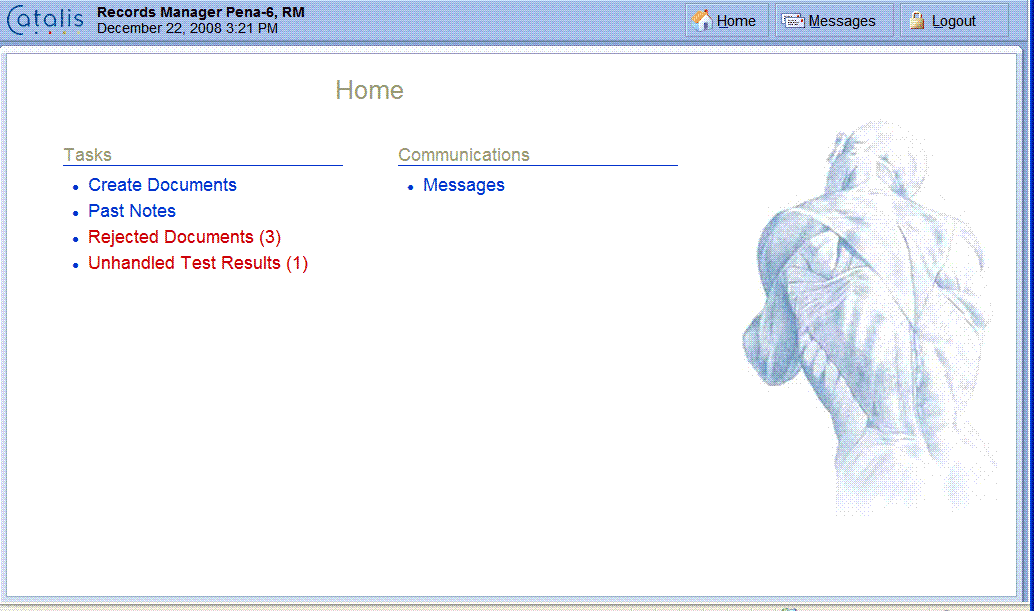 #
#
There is a new link on the Home Page that enables the Records Manager to move scanned in documents that have been misfiled. In the above picture, there is a link in red called Rejected Documents with the number of documents in that link. If a document has been linked to the wrong patient, these are the steps to take:
- Click on the Past Notes link in Records Manager.
- Search for the patient.
- Select and look in the tab of interest like MD notes or Other.
- Click on the document to view it.
- Click the Reject button.
- The document gets sent to the rejected document link in Records Manager.
- They can find the document and delete it, rename it, and/or associate it with the correct patient.
If the doctor sees the document and hits the reject button, it will also send it to the rejected list where the Records Manager can take over. If there are no rejected documents, the link will not be visible.


