Activate / Deactivate labs from the Administrator Module
Login into Administrator Module> Clinic Information > Option
Instructions #
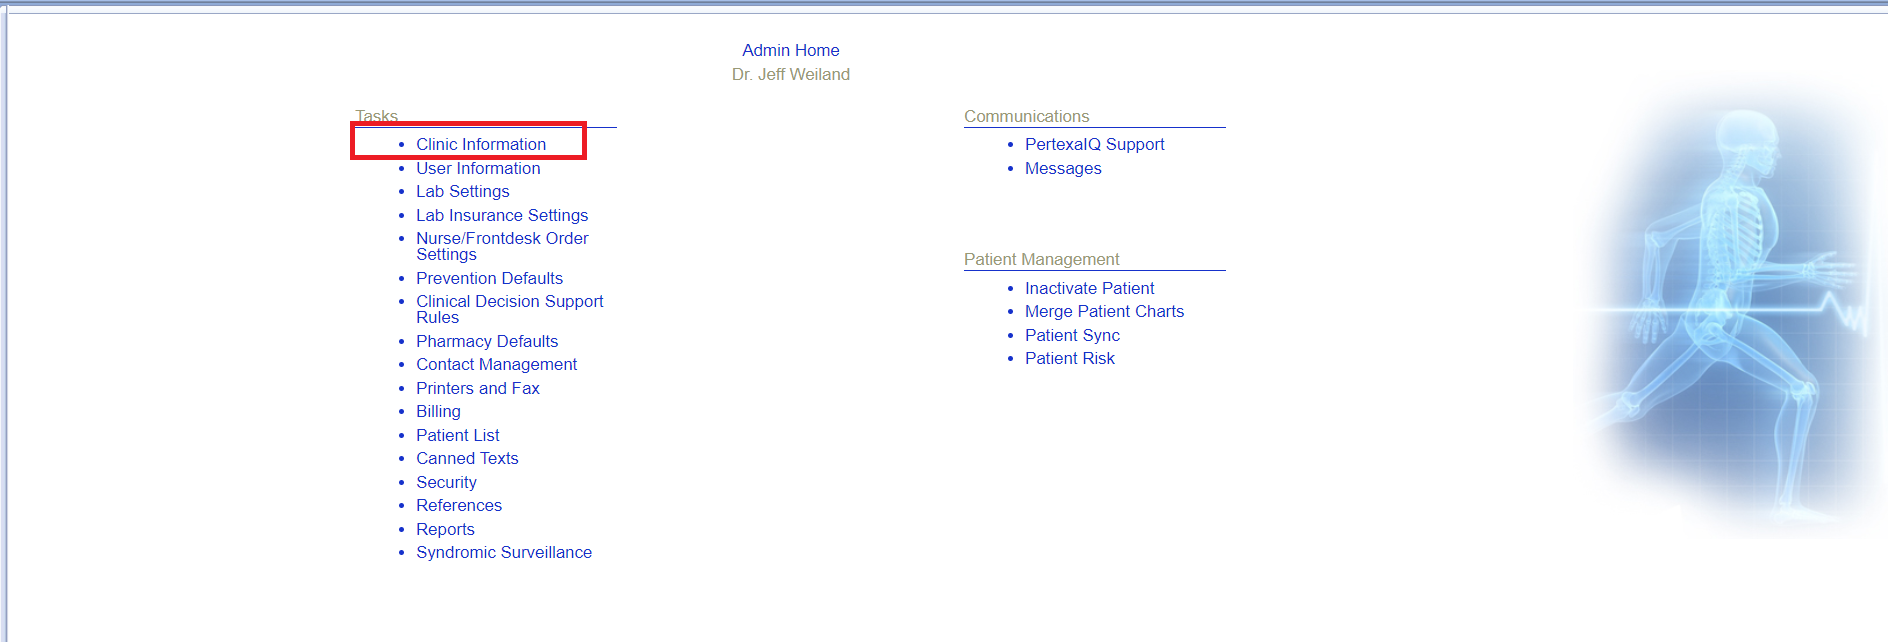
- Login into the Administrator Module. Select the “Clinic Information” link.
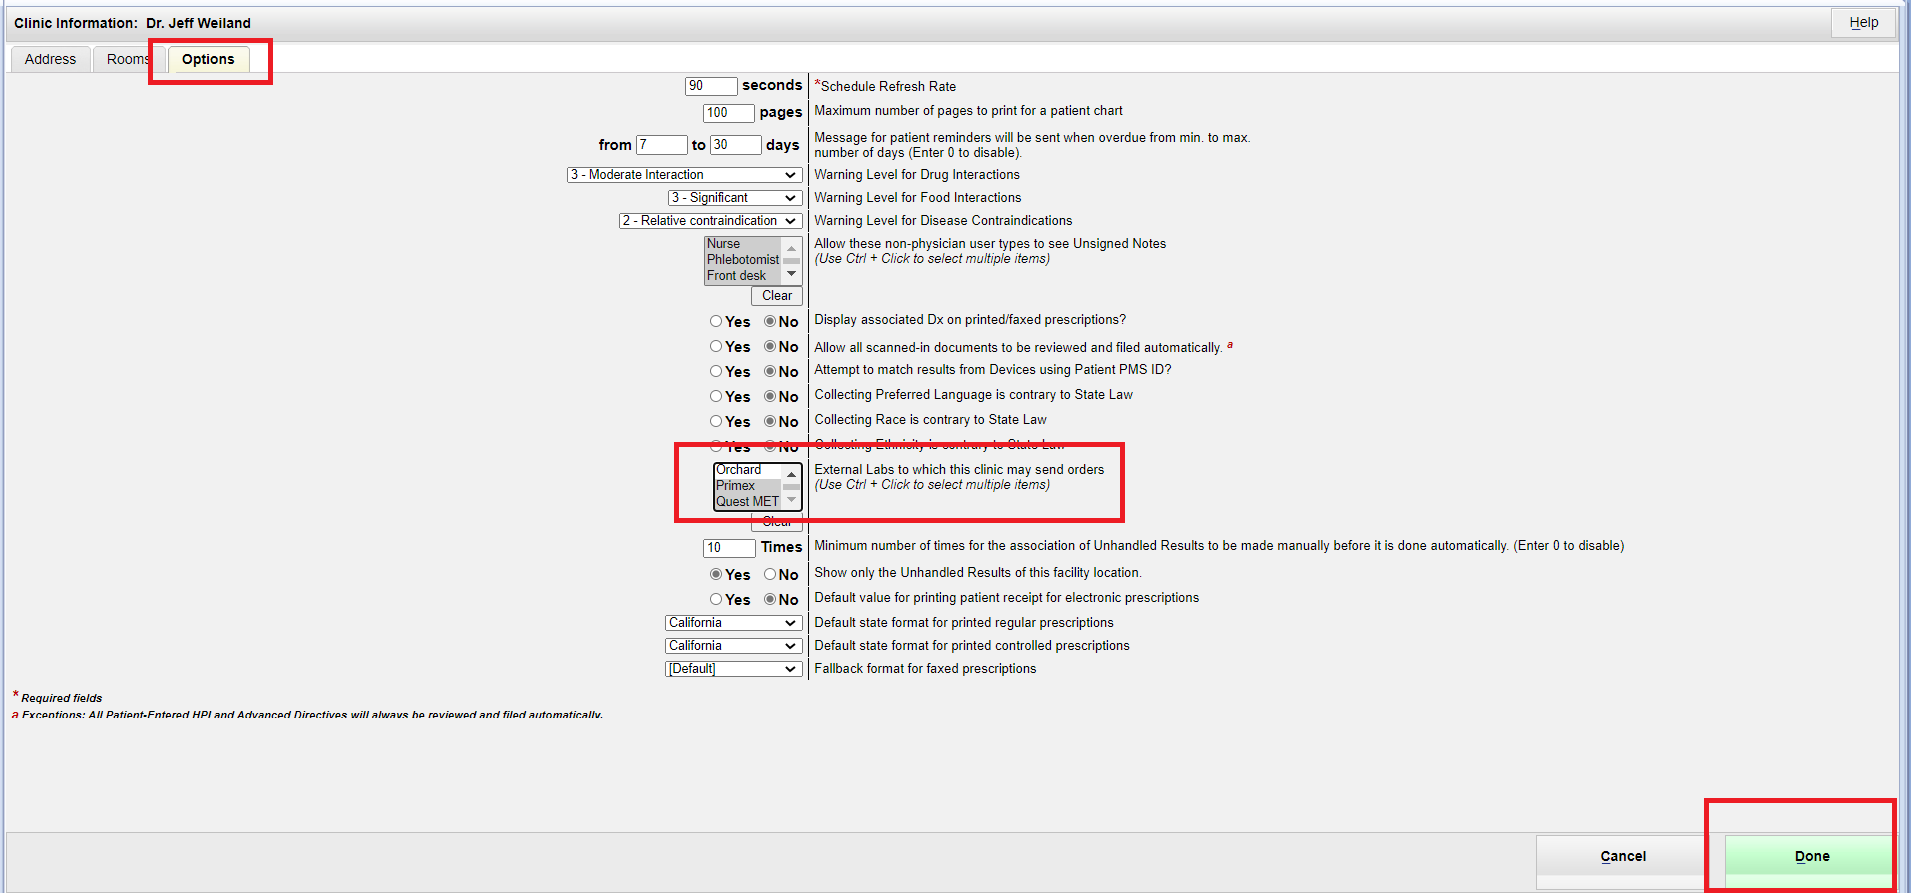
- Select the “Options” tab. Here you are able to Activate or Deactivate labs through the “External Labs to which this clinic may send orders”section on the page. When you have selected all of the labs you would like to show, select the “Done” button.
Overview and Navigation #
Face Sheet > Orders > Lab Order > Add
Instructions #
– Search Option
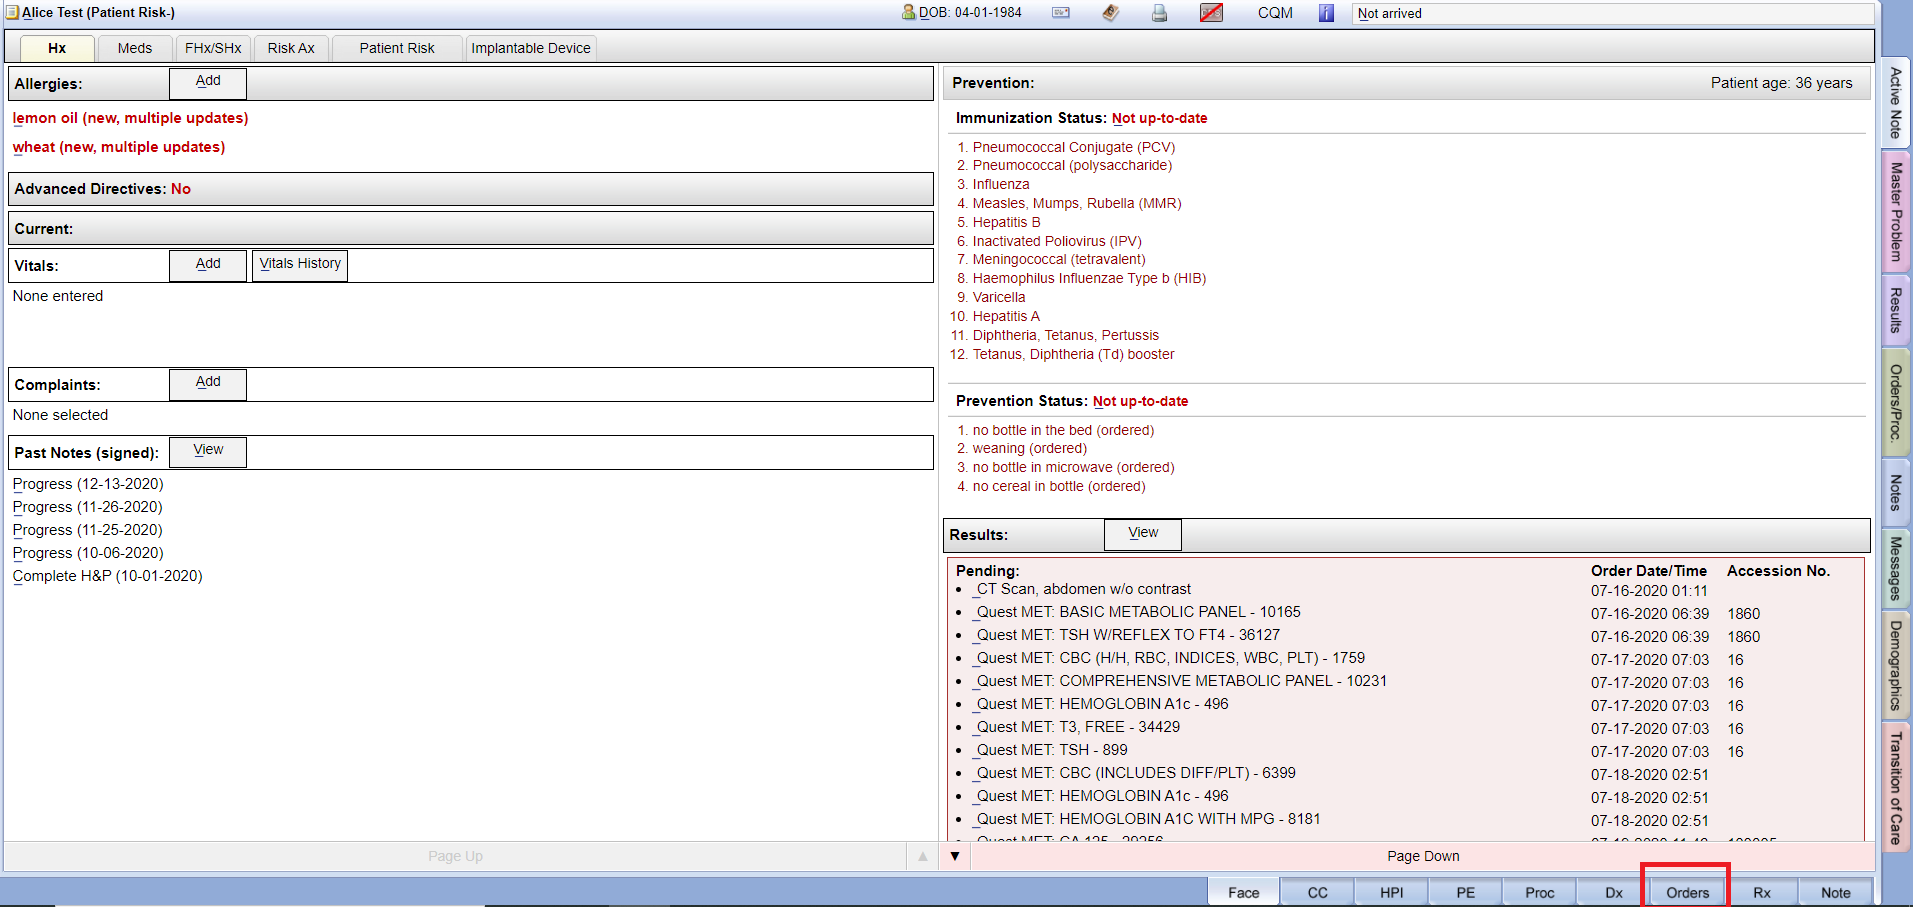
- Navigate to the Orders tab.
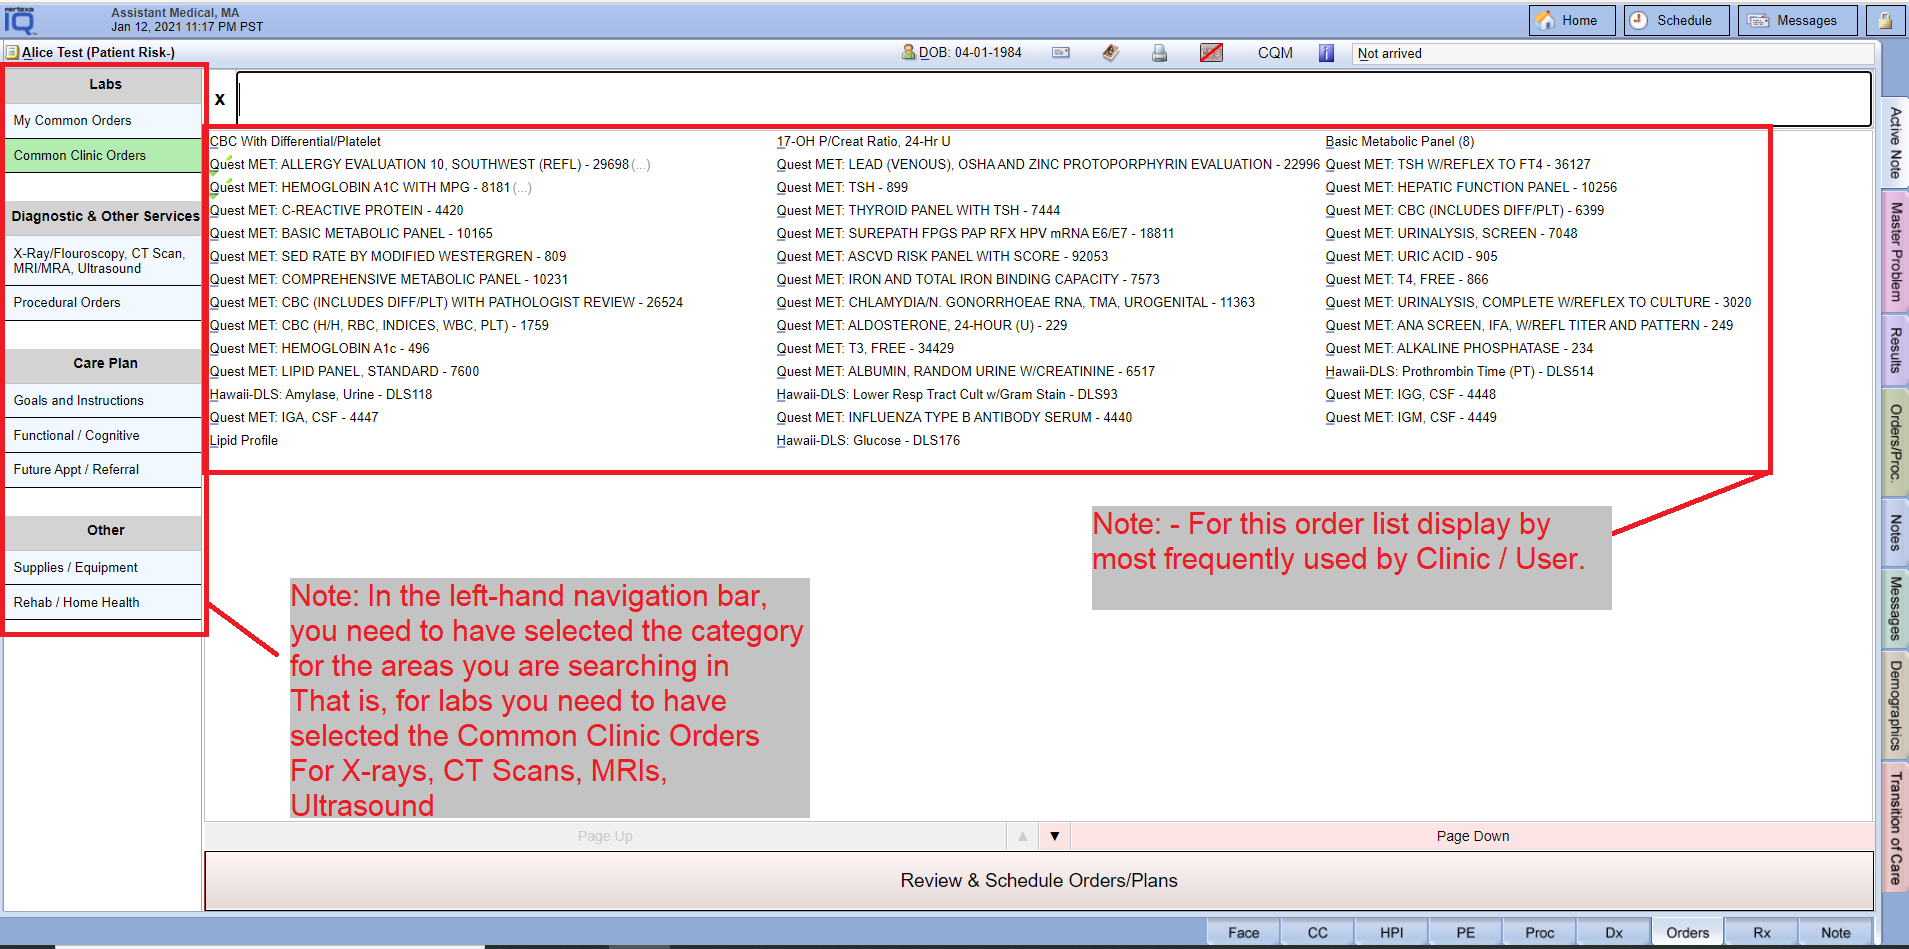
- Select or search for the lab you want to order. If your search returns no results, try searching using the first four letters of the lab order. Select the lab order you want to request.
- Search by entering into search bar by:
- First few characters of lab test
- CPT code
- Lab Order code
- Combination characters of each criteria
- Search by entering into search bar by:
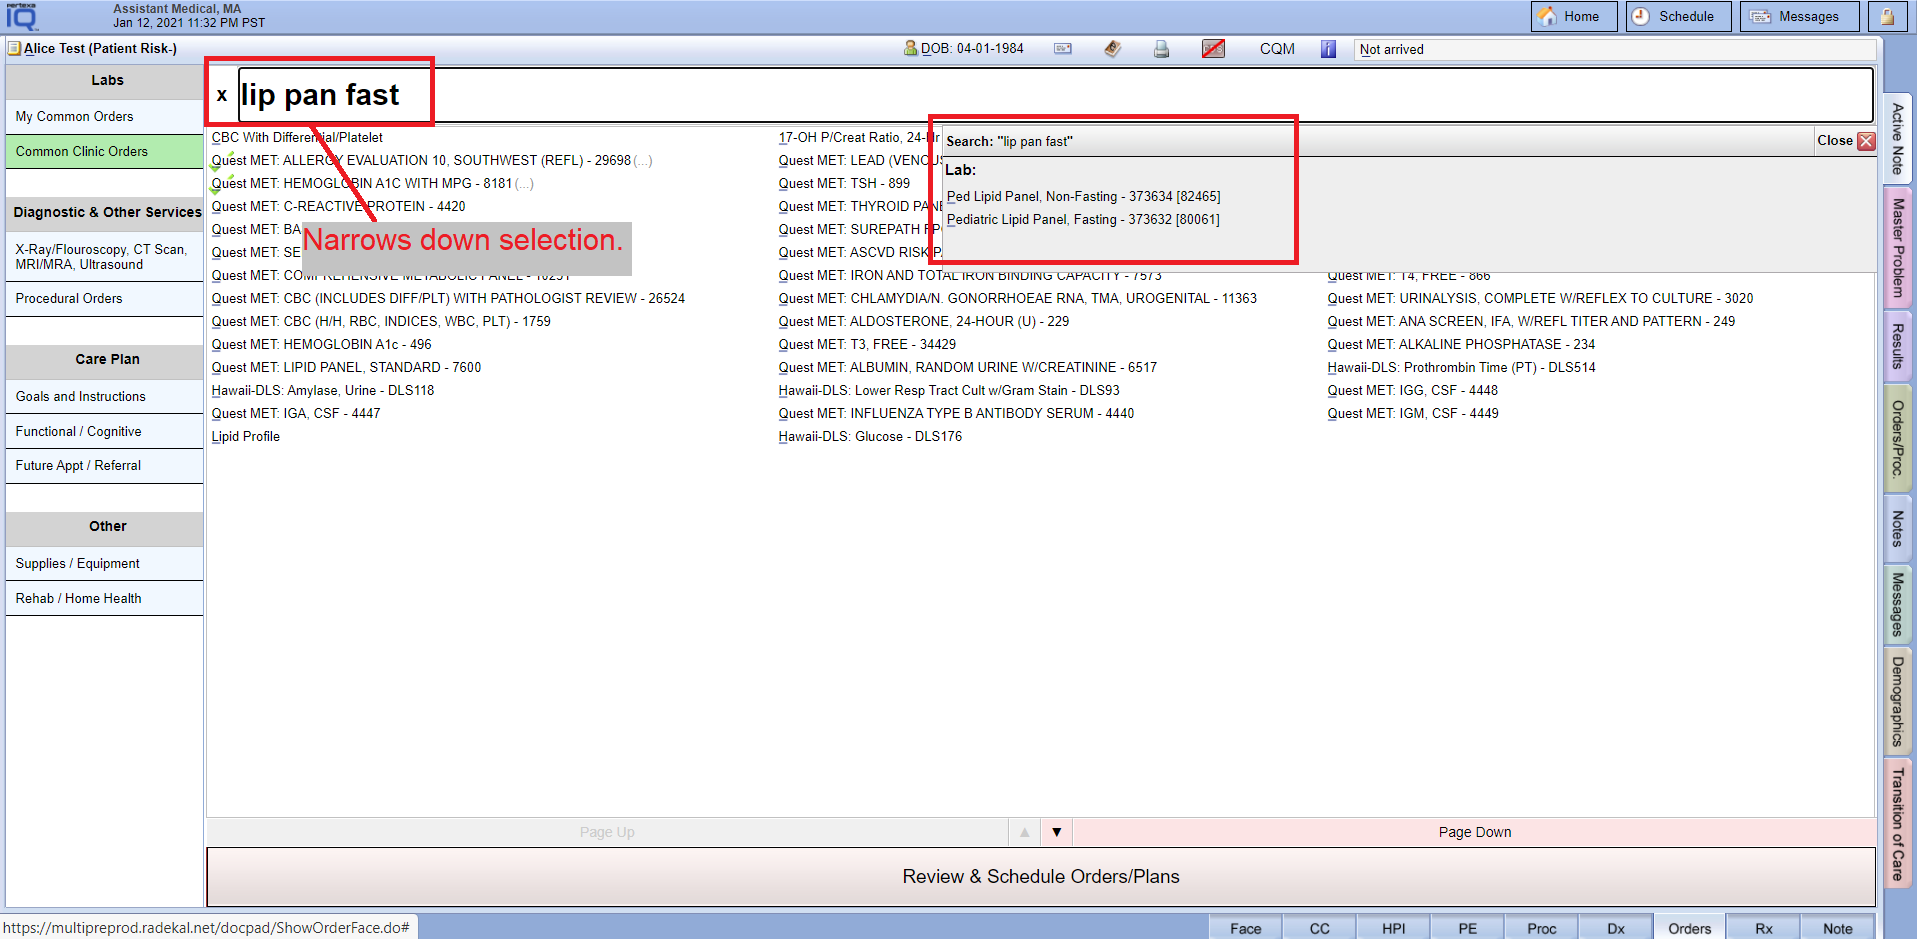
– Filtering Orders
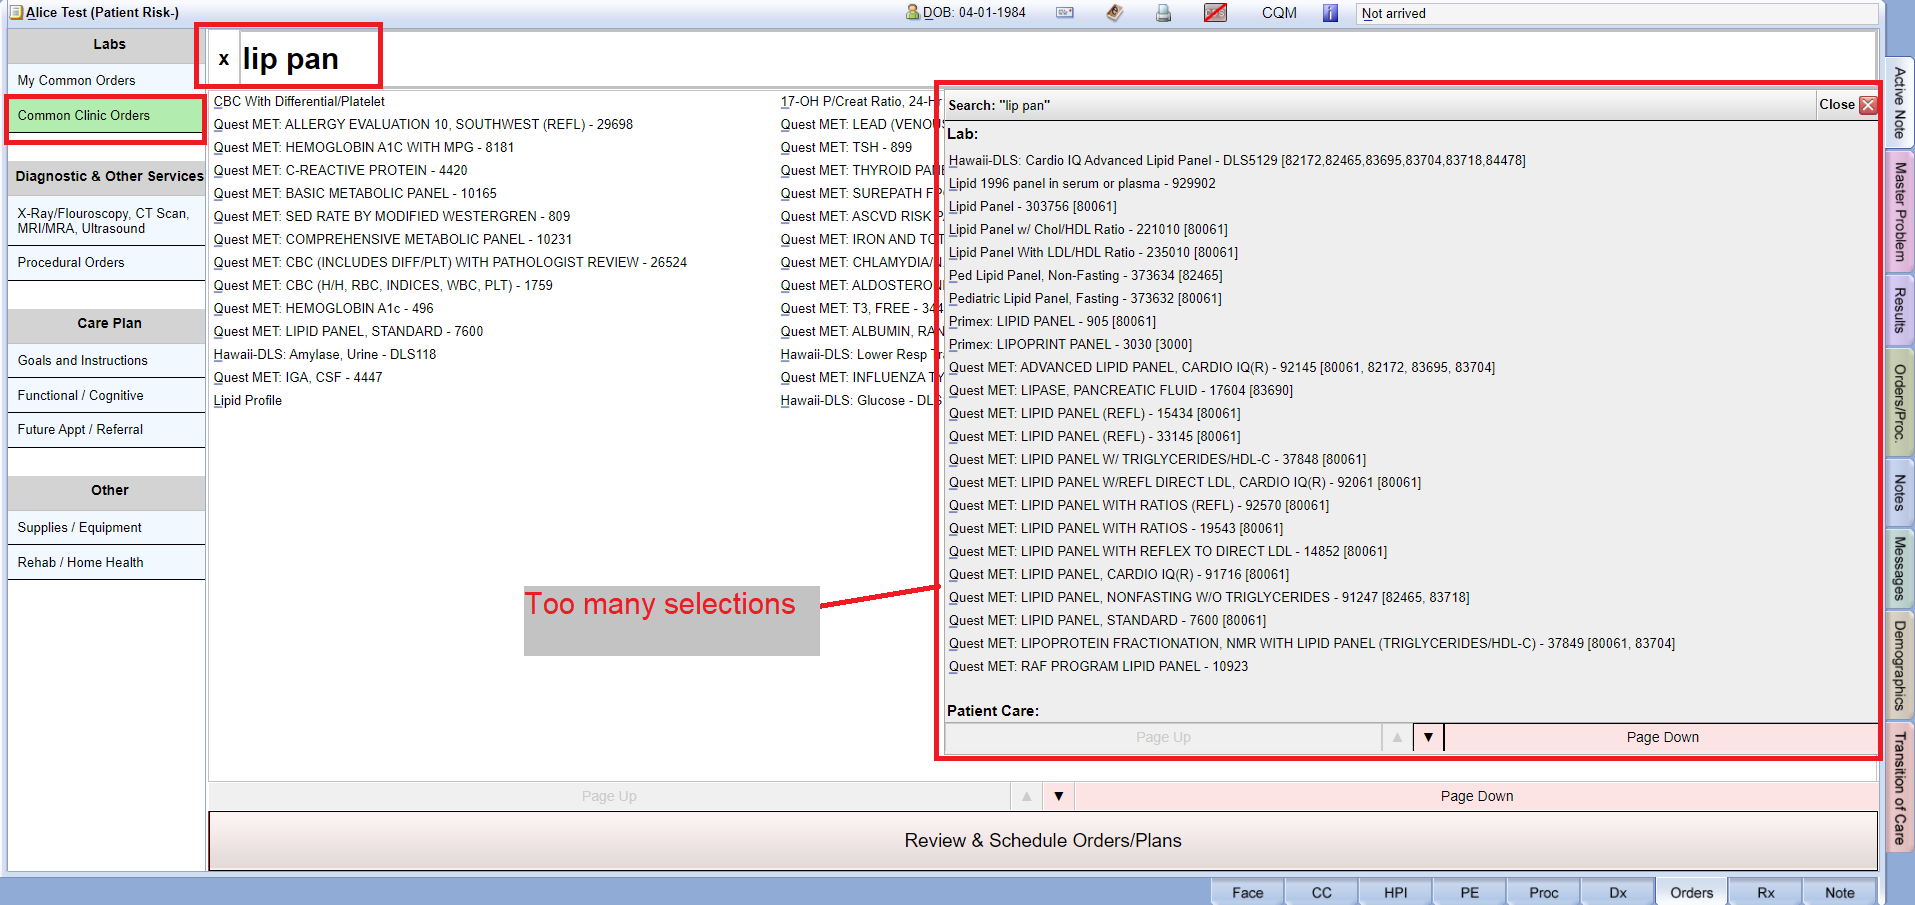
Some providers may just say “Lipid Panel” You could enter any of the following: “Lip Pan” If you know it is Quest Labs “Lip pan que” If you know it is Lipid Panel Fasting “Lip Pan Fast”.
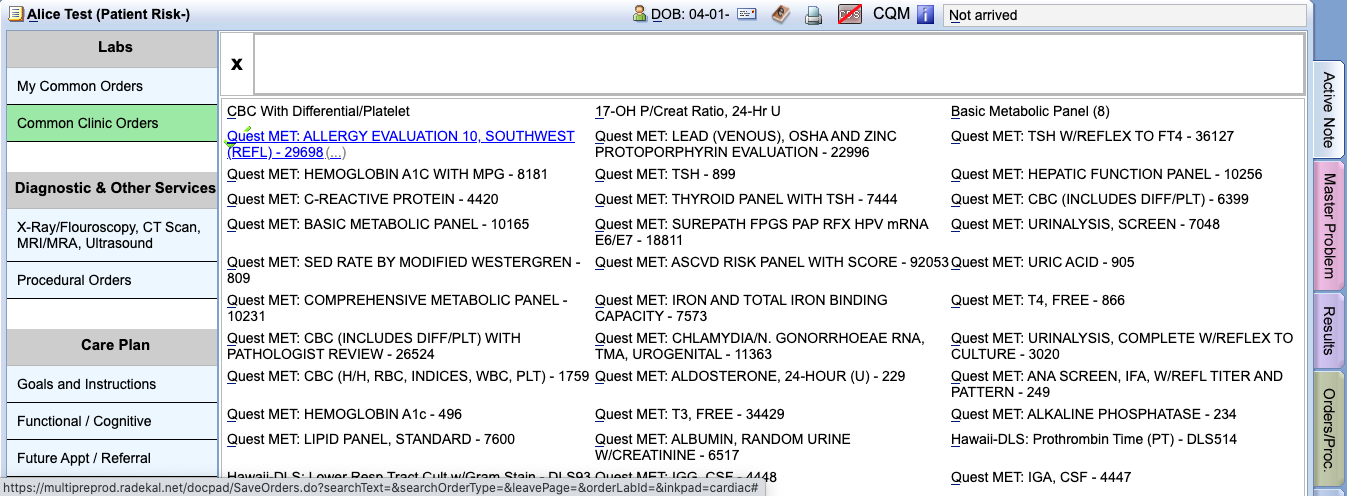
– Select and Enter lab orders
You can select the orders with the green check mark in the filter list or in most frequently used orders section.
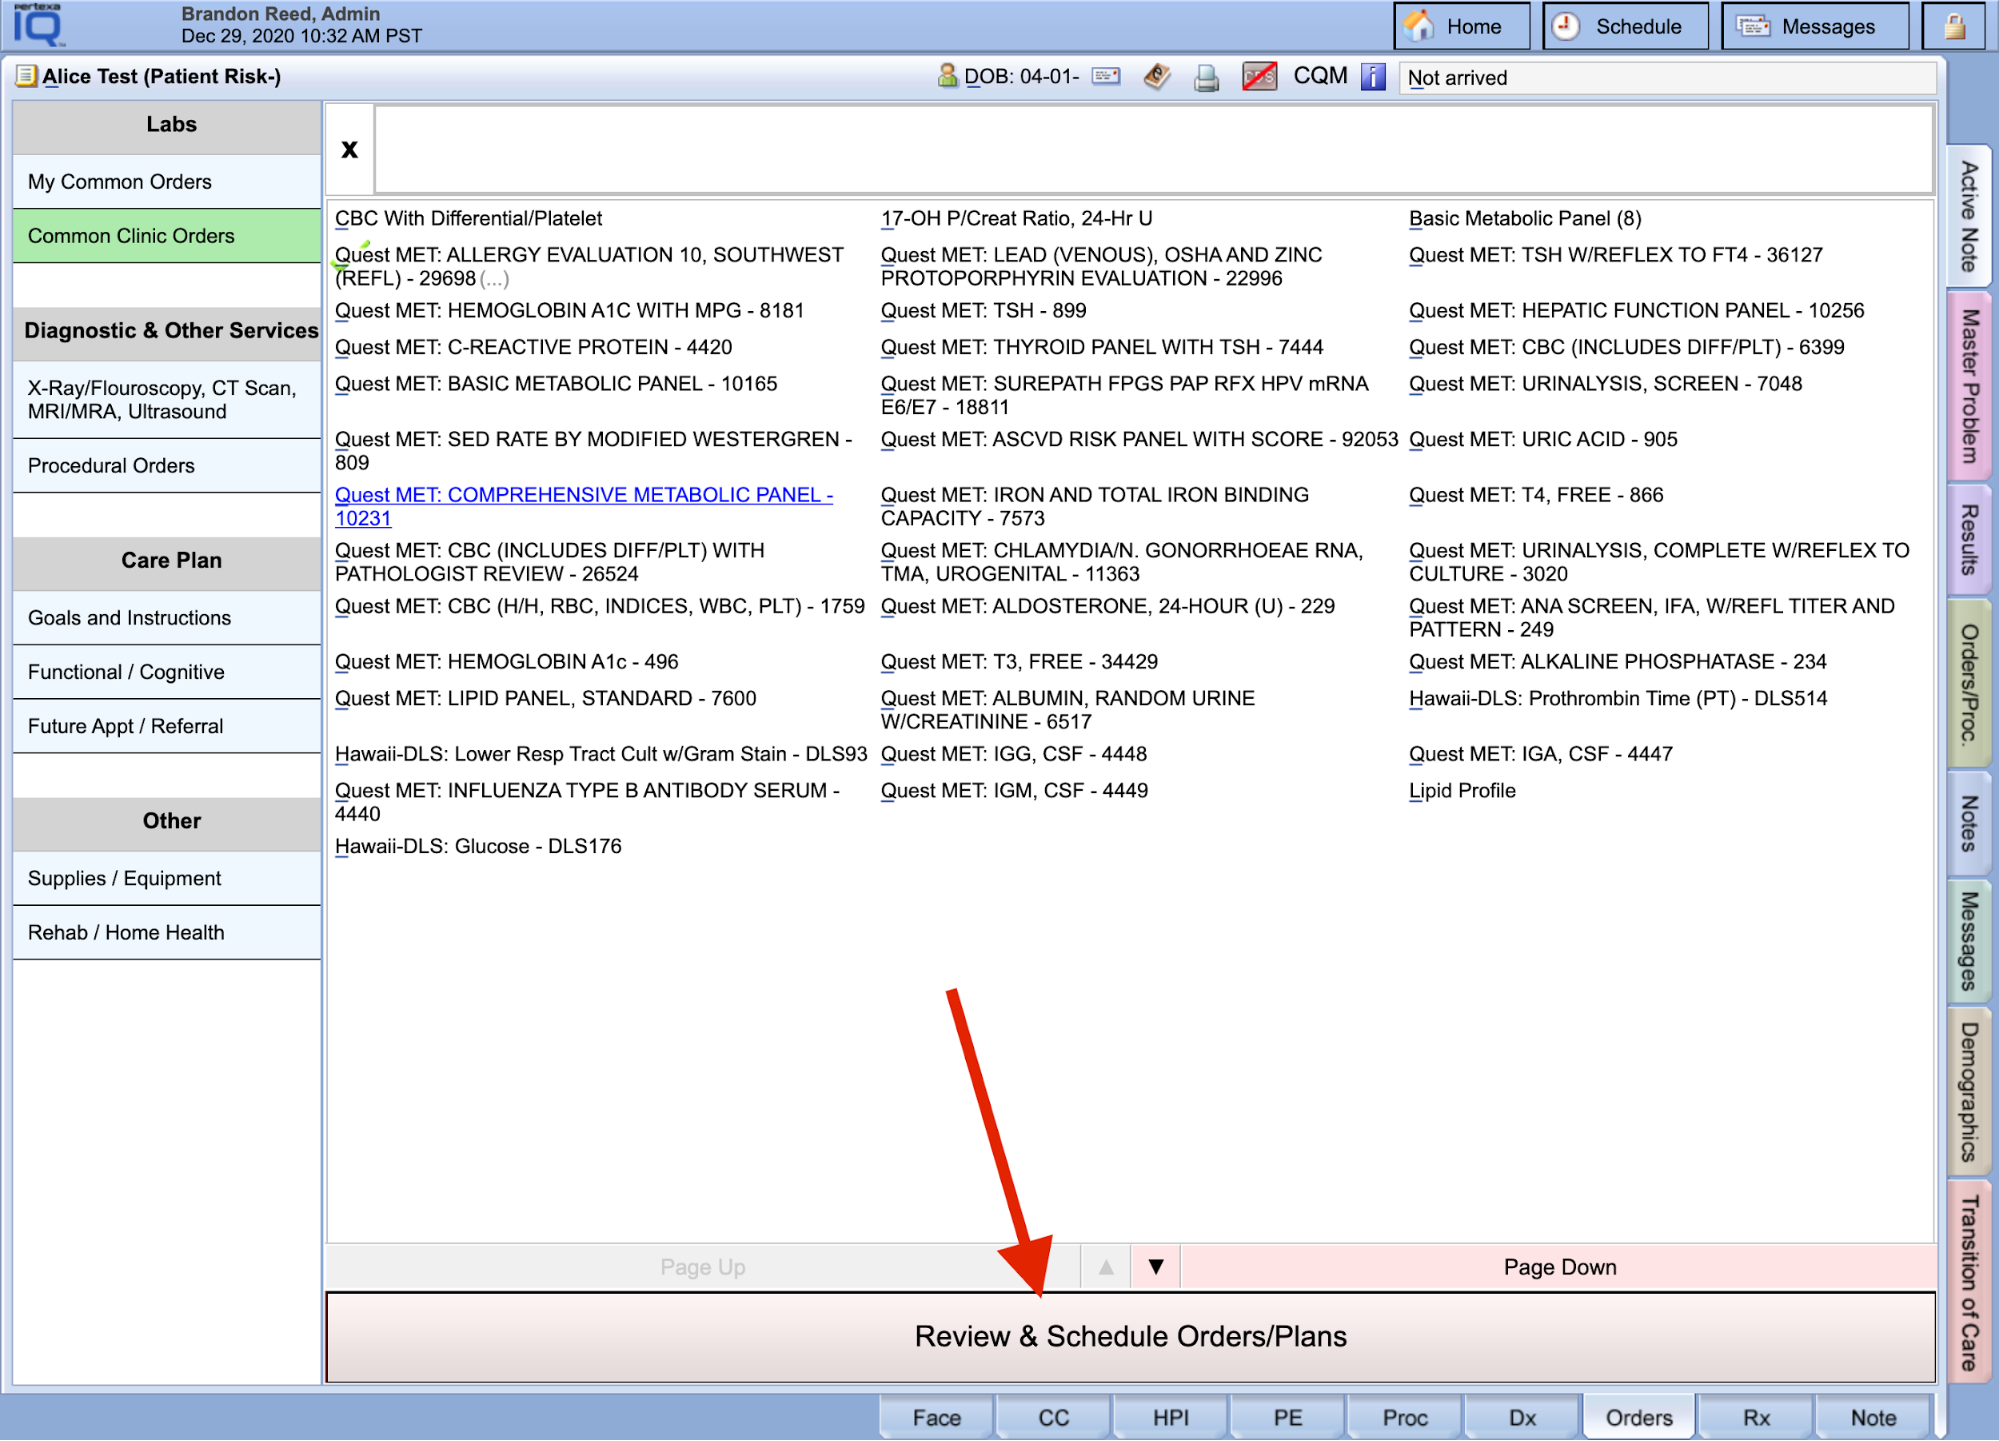
– Review orders which you have selected.
- Select Review and Schedule Orders/Plans at the bottom of the page.
- Verify that the orders you selected are correct and then select “Send for Processing.” You can also “Print Unprocessed Orders” by selecting the option at the bottom left corner of the screen.
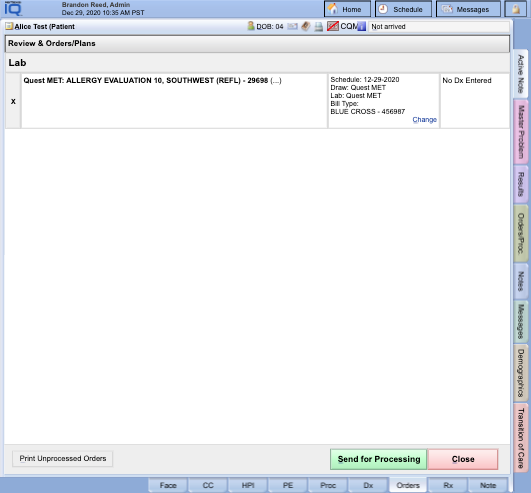
– Removing an order
If you would like to remove orders then simple tap on the “ X ” button in the Review and Schedule Orders/Plans page.

Lab Orders and Parameters #
Face Sheet > Orders > Review and Schedule Orders/Plans > change
Instructions #
– Summary of First Tab “Scheduling Details”
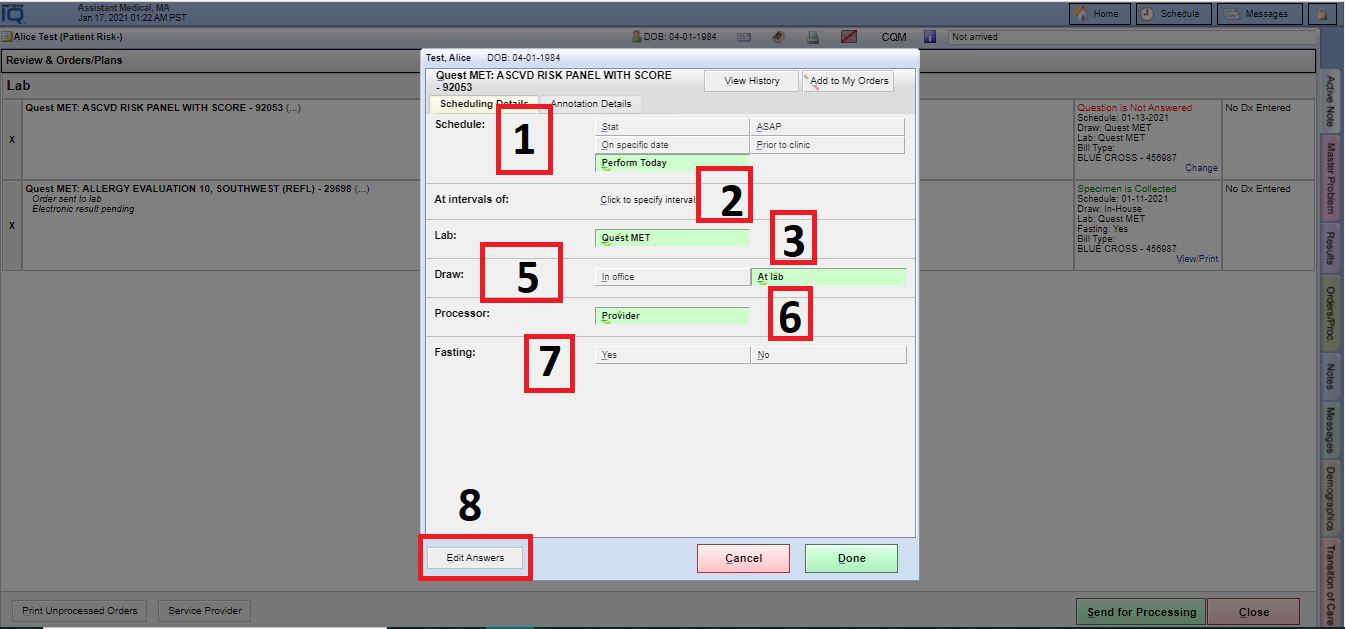
- When the order should be performed.
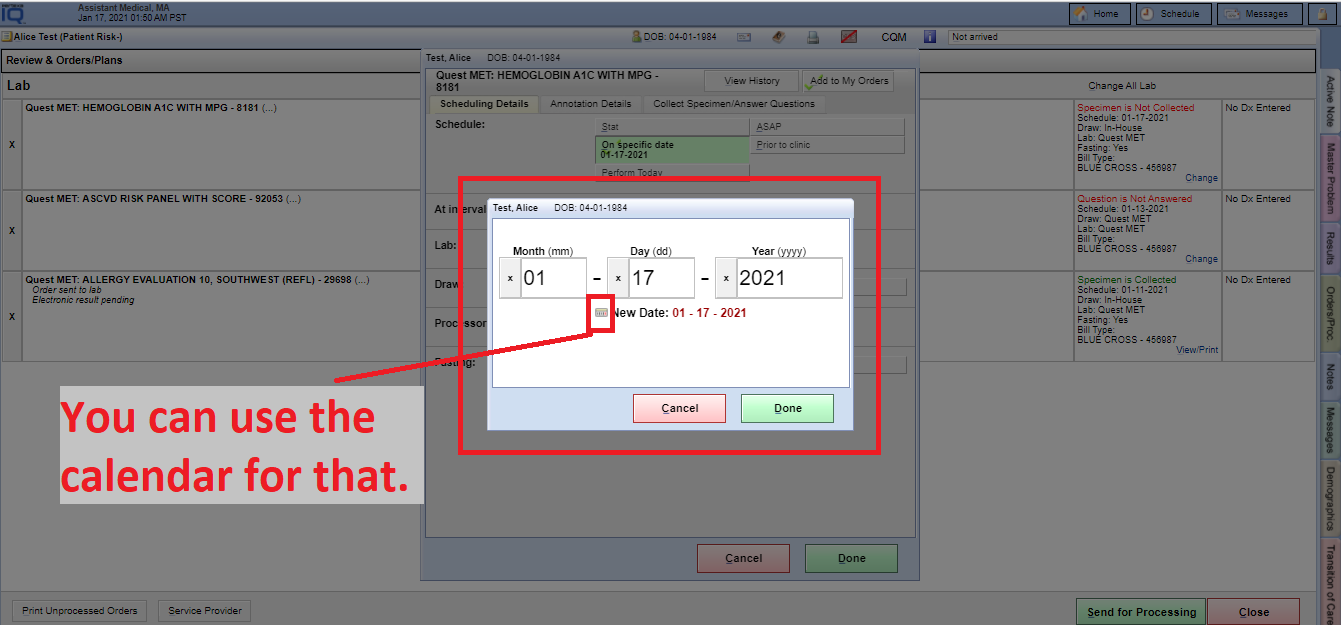
- Lab to be done on Specific Date :- On Specific Date:- with this functionality you can set a particular order Schedule with Today Date OR In Future date.
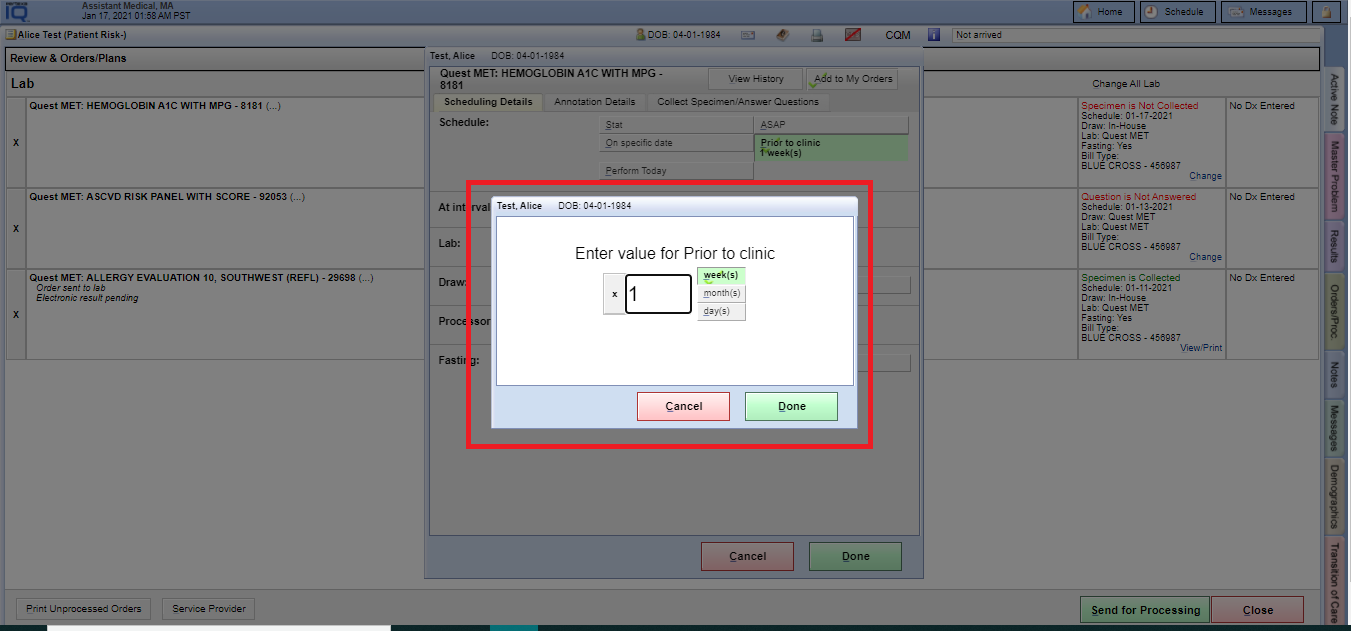
- Prior to clinic:- Selecting weeks, months or days (e.g. This test should be performed 1 week prior to clinic)
- Lab to be done on Specific Date :- On Specific Date:- with this functionality you can set a particular order Schedule with Today Date OR In Future date.
- Intervals, frequency or recurring
- When you want to place this order at different intervals (e.g. This test should be performed 2 times per year 10 times maximum times).
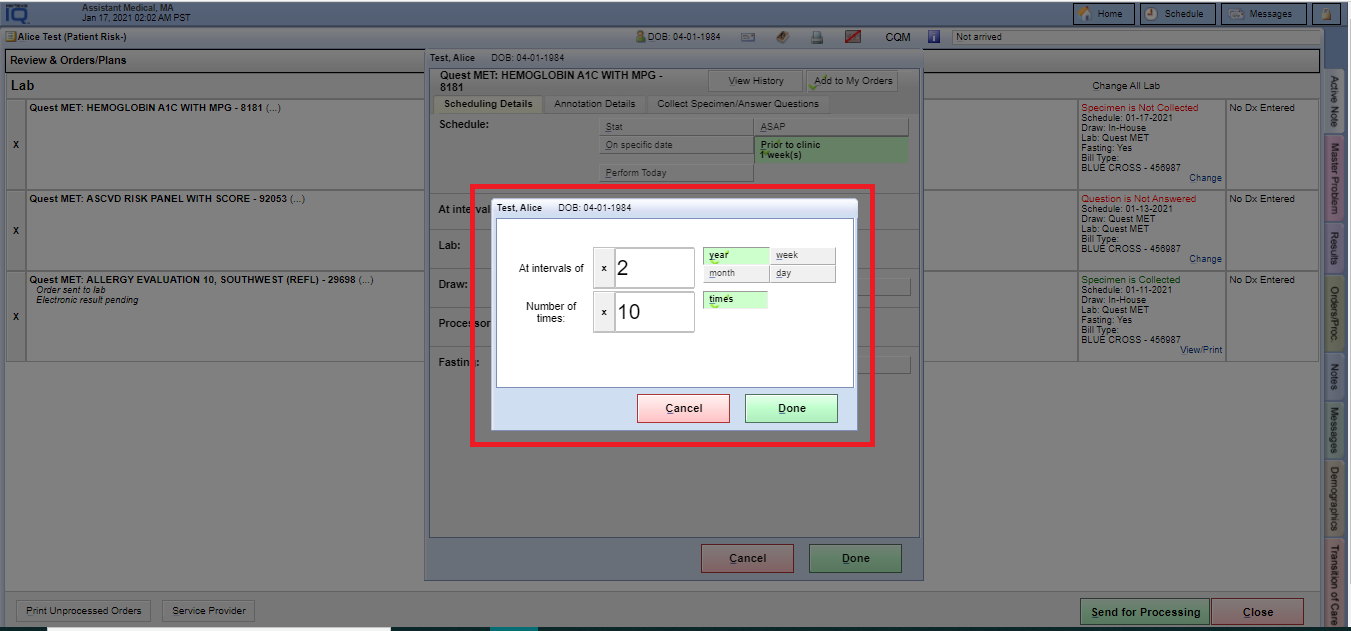
- When you want to place this order at different intervals (e.g. This test should be performed 2 times per year 10 times maximum times).
- Labs clinic can send e-orders
- Location where order is performed
- Who is requesting the order
- Ask Order Entry.
- Some labs require additional information on specific orders when specimens are collected in-house.These will automatically be displayed for you as the 3rd tab > “Collect Specimen/ Answer Questions”
- These MUST be completed for the order to process.
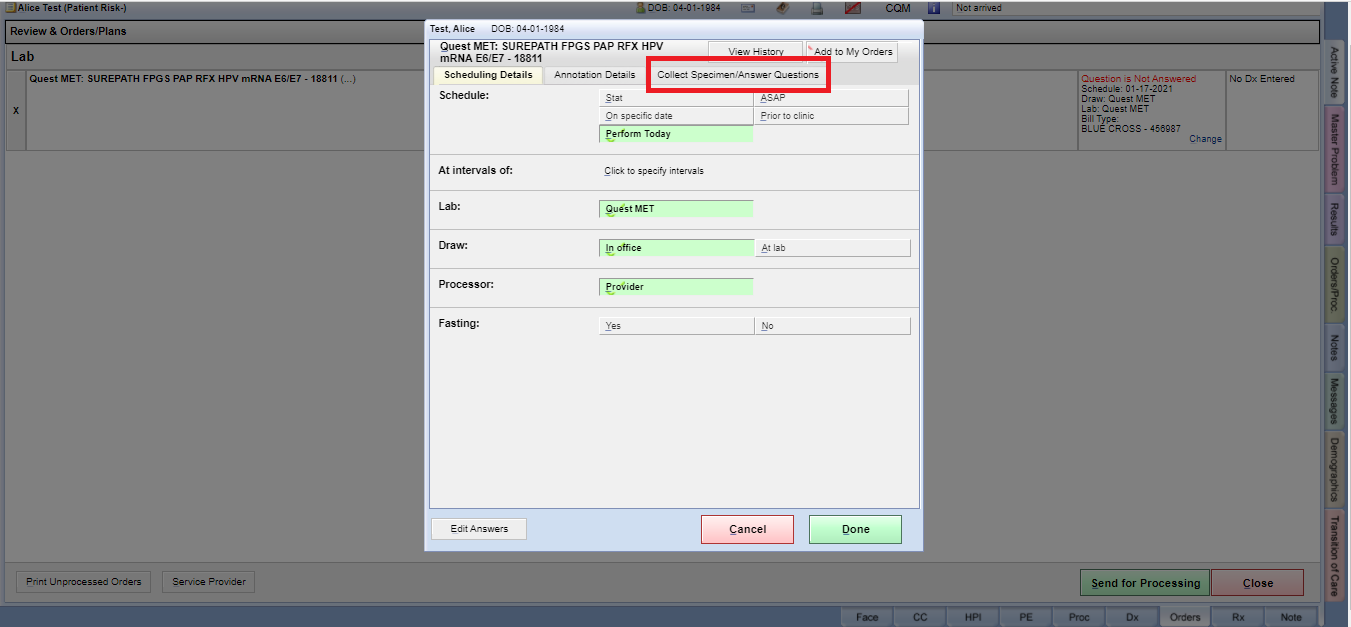
- Tap on the “Collect Specimen/ Answer Questions” tab.
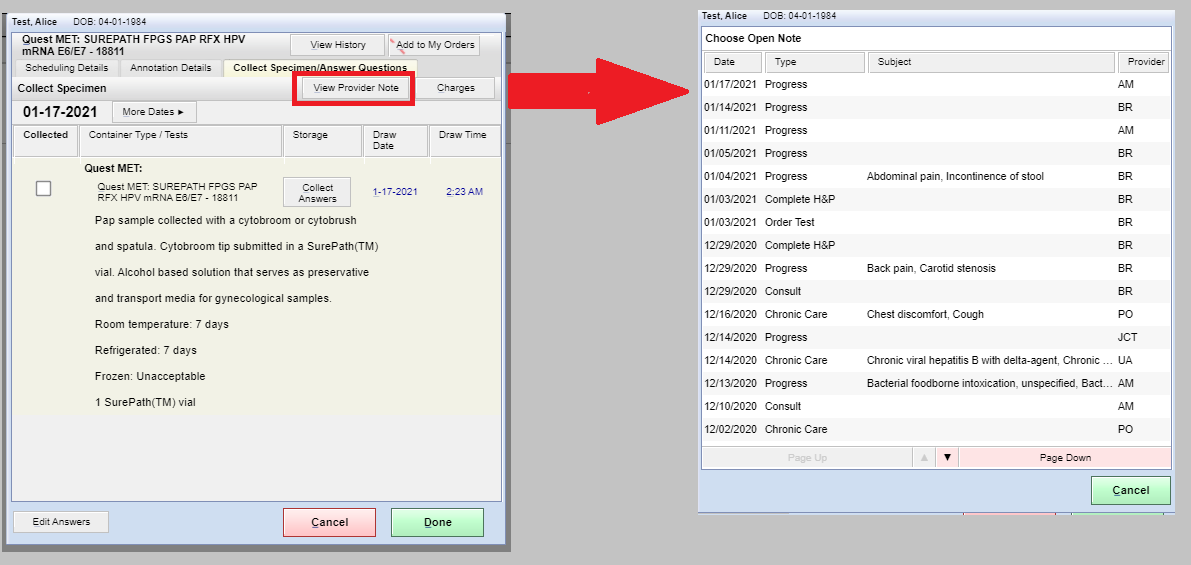
- Here you are able to see the provider notes with “View Provider Notes Button”.
- You can collect Specimens with a green check mark.
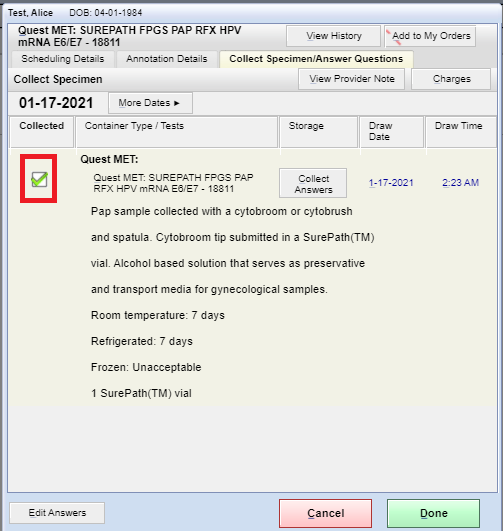
- If additional information on specific orders is required then you can do with “Collect Answers Button”.

- If you want to change Draw Date and Time then tap on the date and time link.
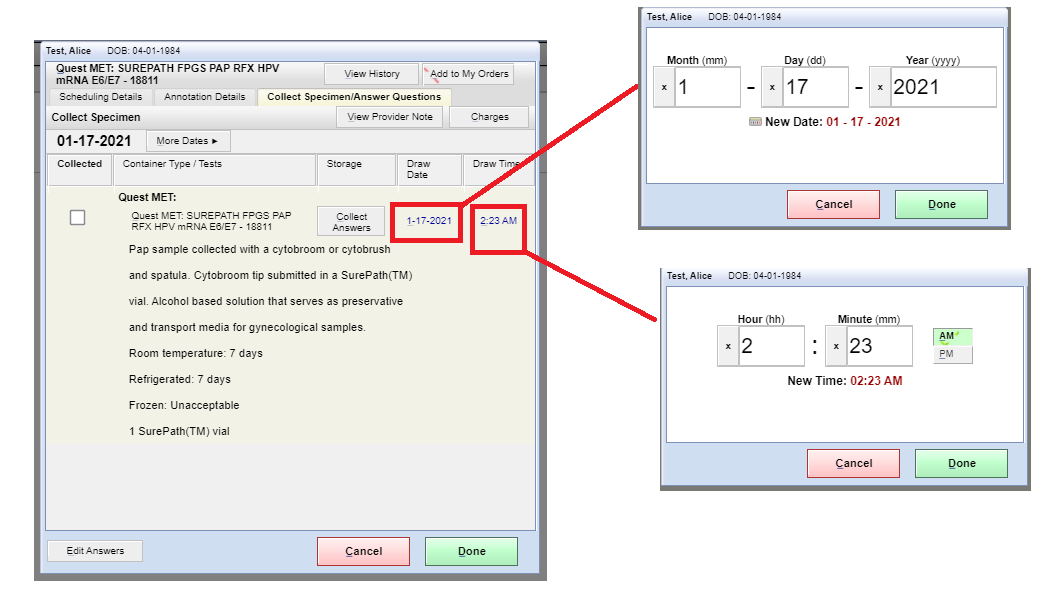
- Some labs require additional information on specific orders when specimens are collected in-house.
- These MUST be completed for the order to process.
- The warning is on the review screen alerting the user

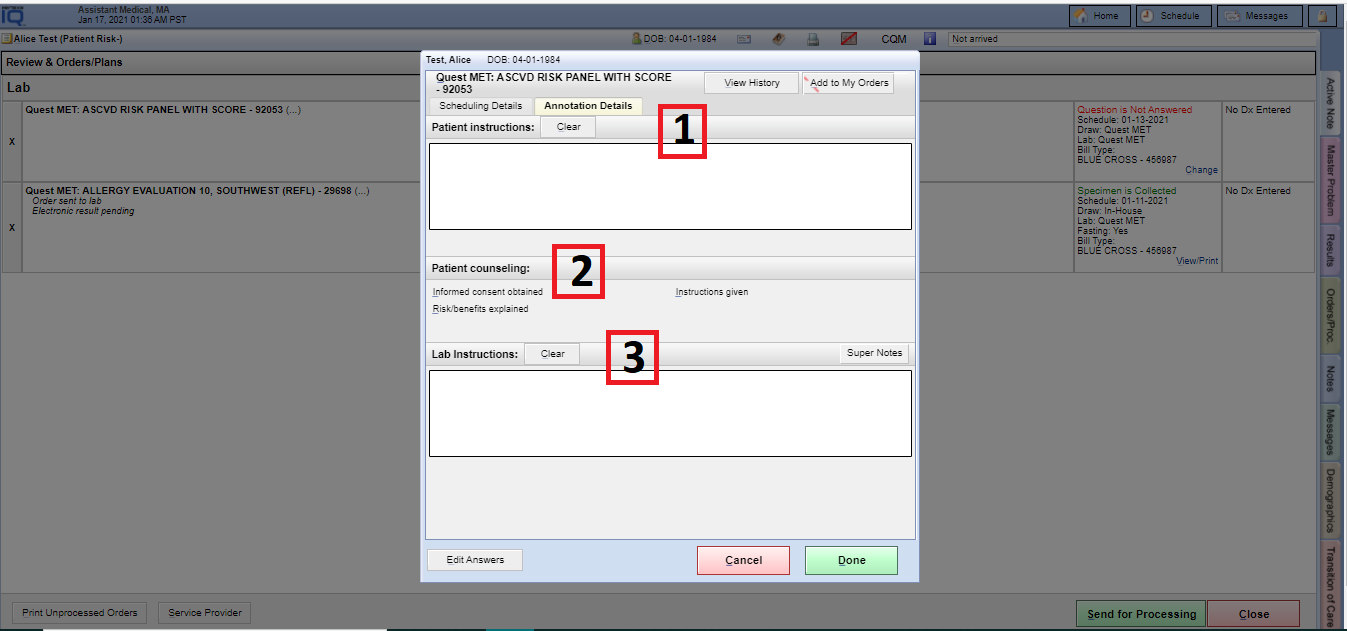
– Summary of Second Tab “Annotation Details”
- You can add patient instructions.
- You can select Patient counselling.
- As well as you can add for Lab Instructions.
In-House Collection Pending Orders #
Login into Docpad > In-House Collection Pending Orders link.
Instructions #
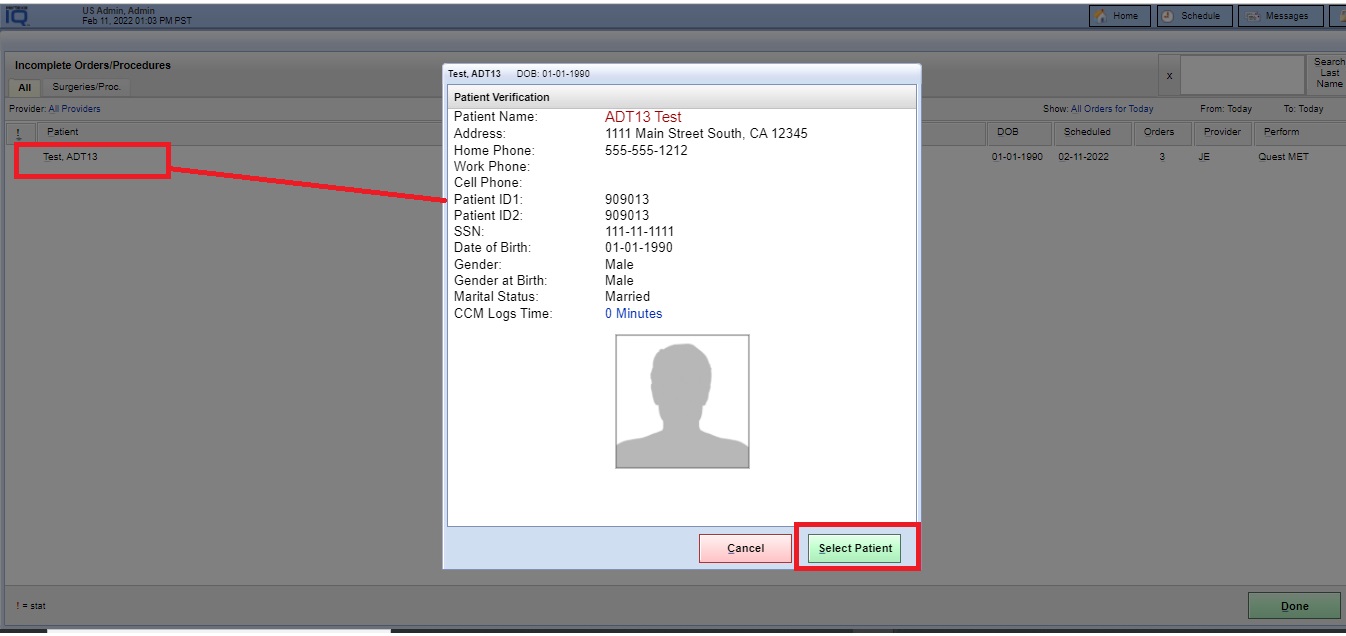
- Login into Docpad and select In-House Collection Pending Orders link.
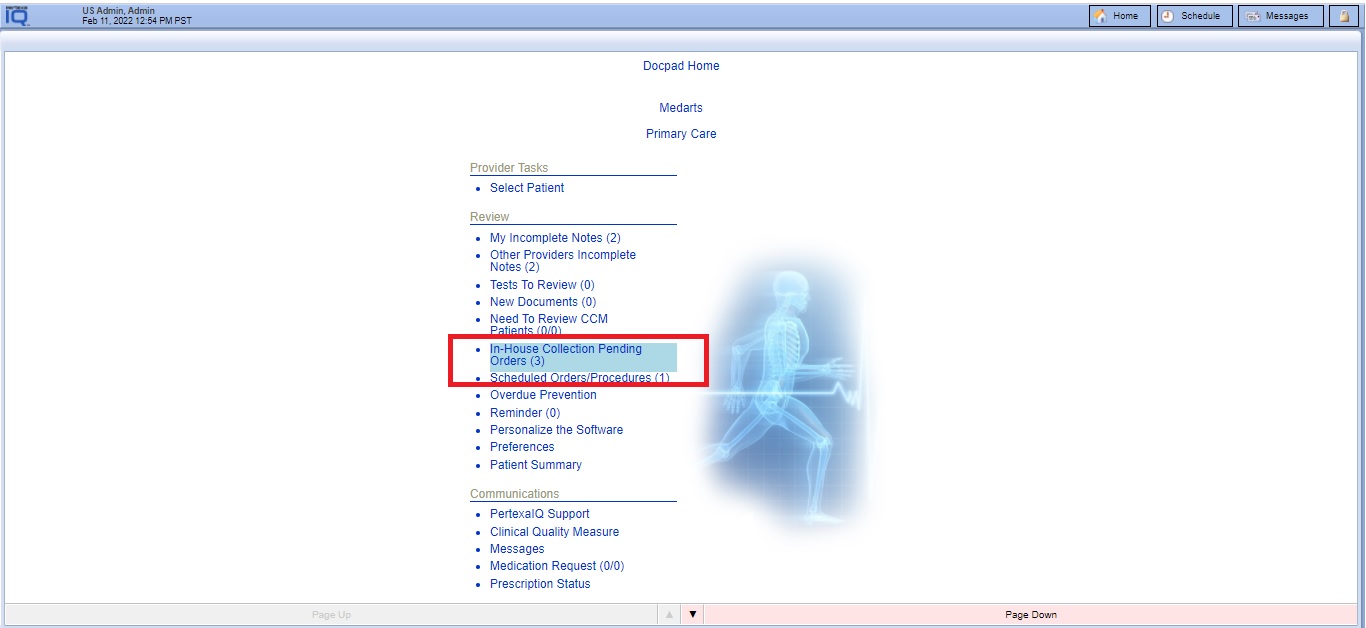
- Here you can see and get all In-House pending orders. As well as you can also filter the pending orders list with particular Provider, Patient or Schedule time.
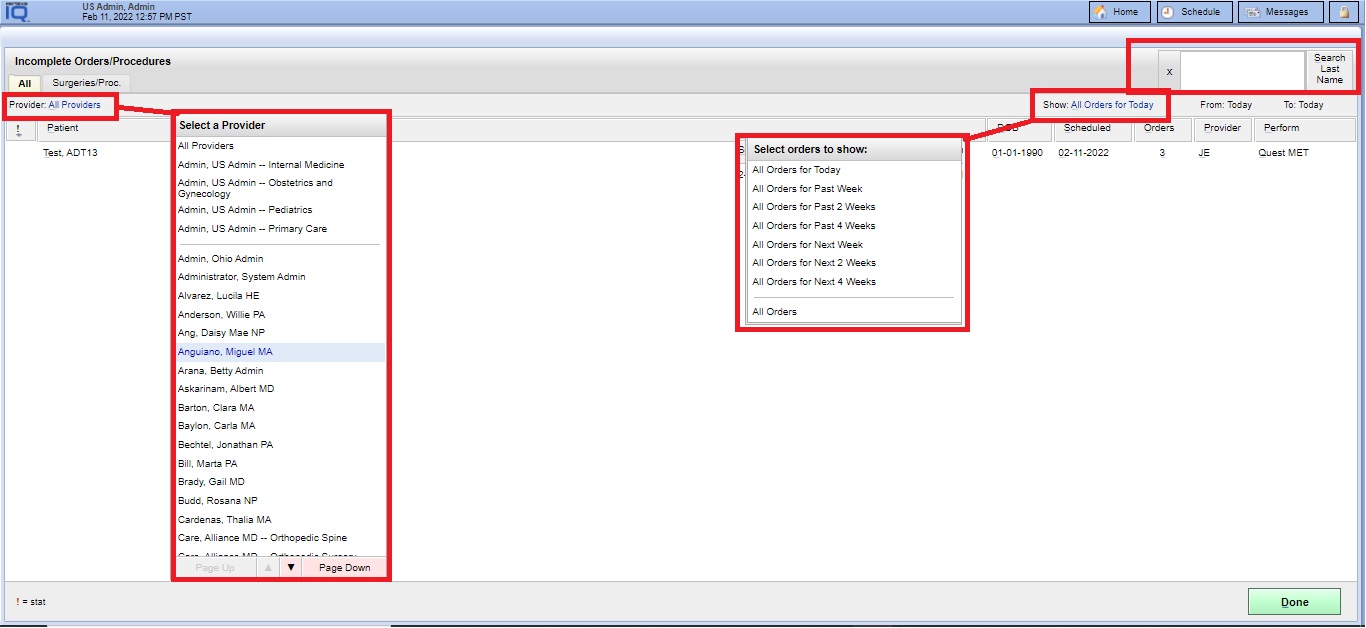
3. Select Patient. Here you can able to select collect specimen with green check mark and put the required question and answer.
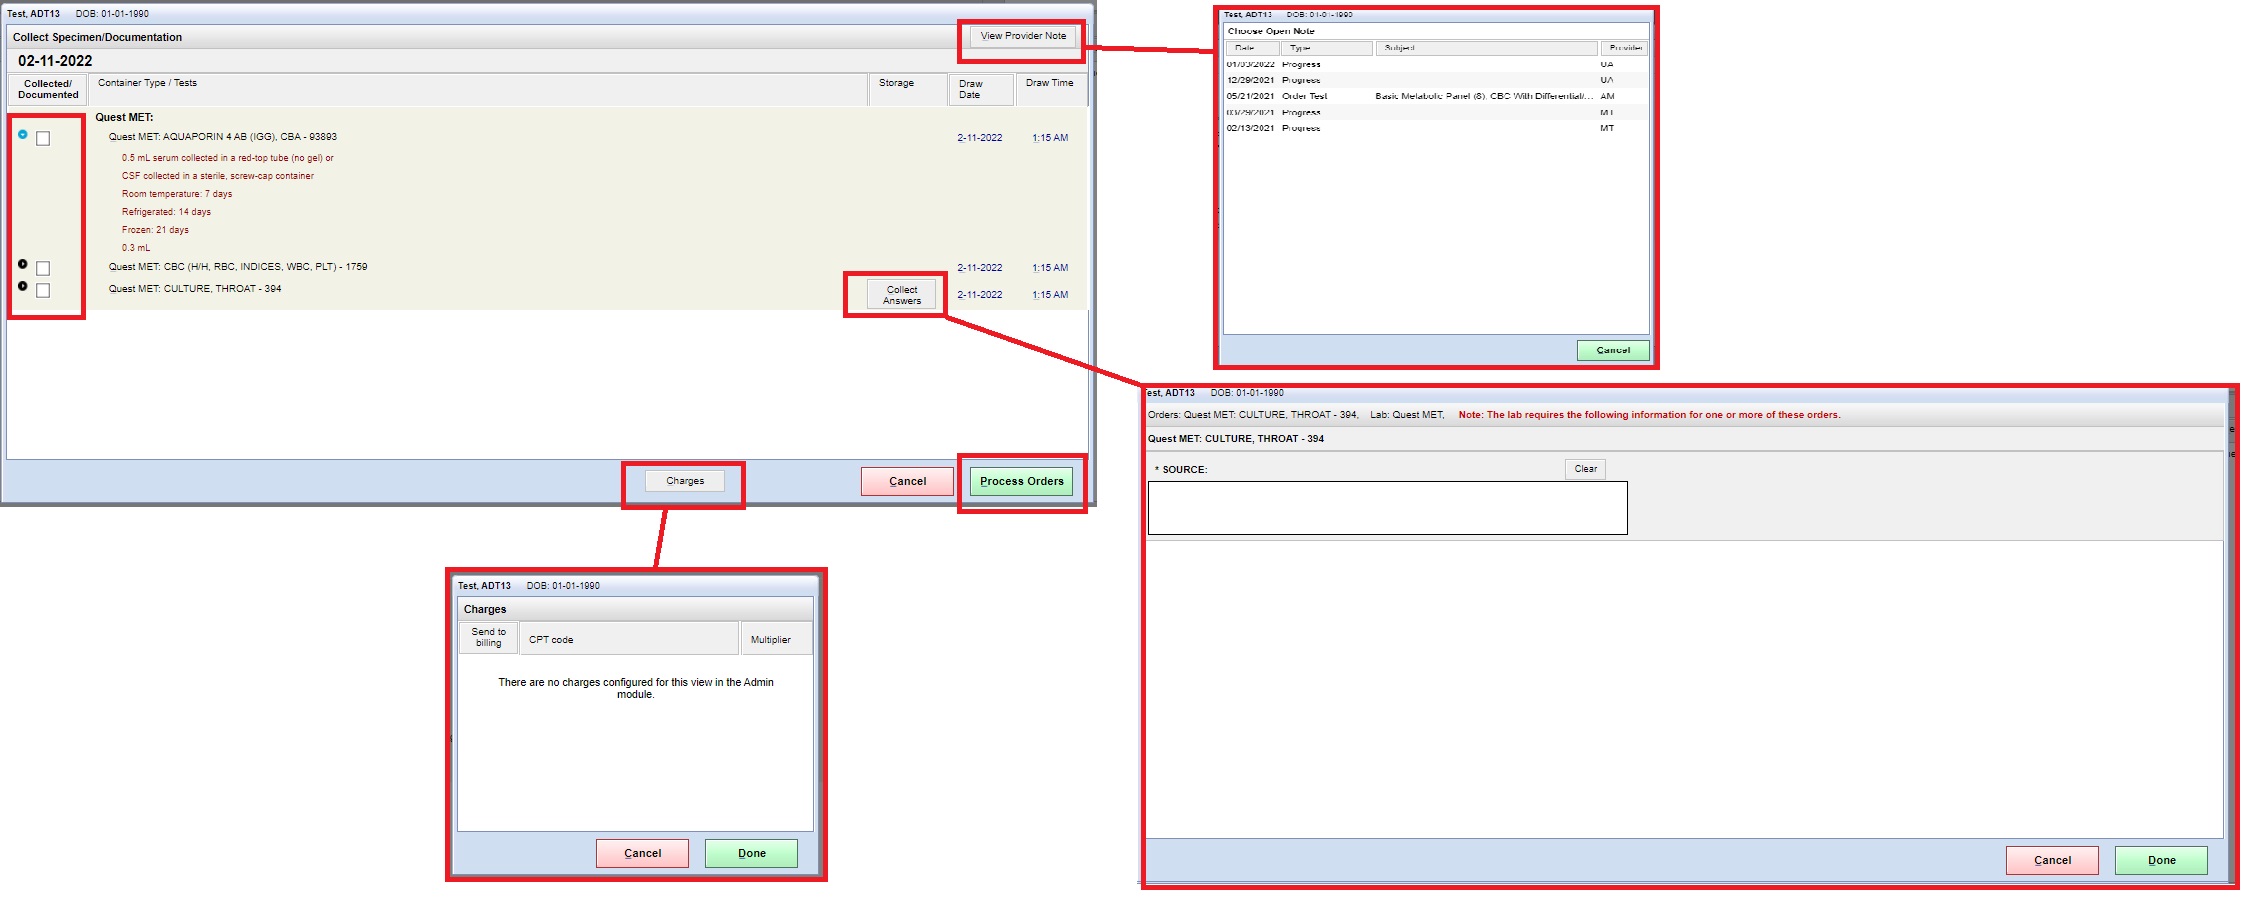
4. Finally Select Process Orders.
Advanced Beneficiary Note (Medicare patients) #
Face > DOB (1)
OR
Face > Demographics (2)
Instructions #
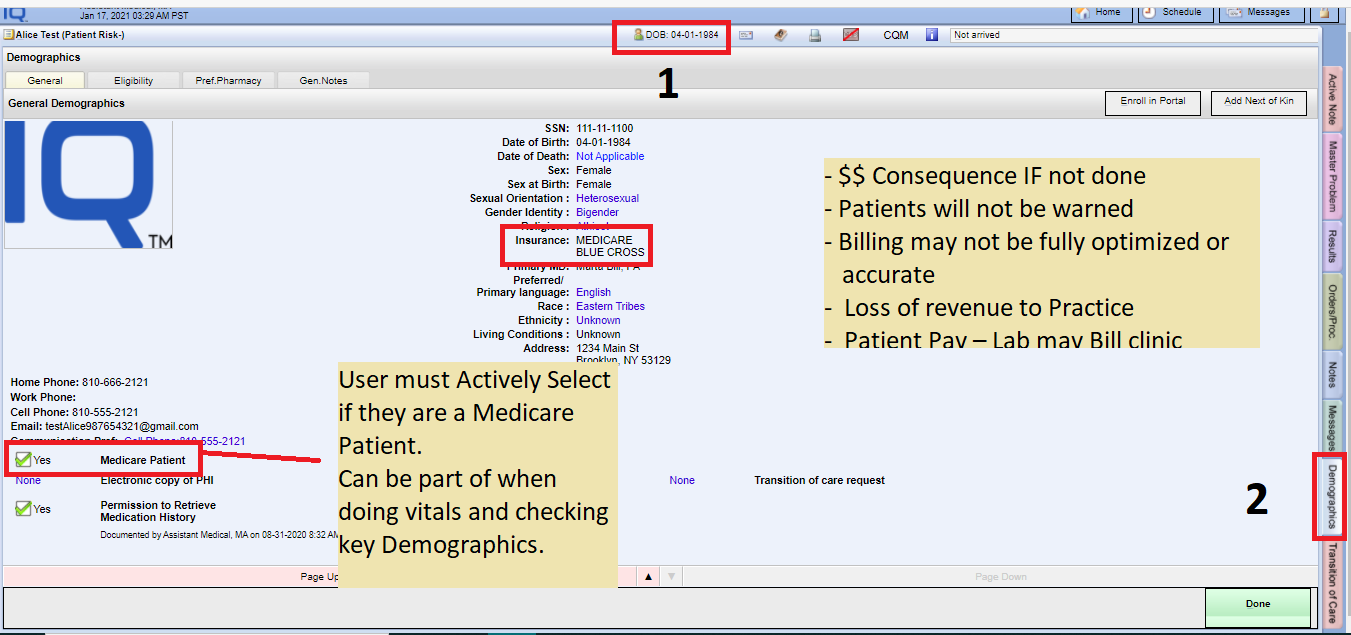
- Navigate “Demographics tab” from the face sheet page.
-
- Users must Actively Select if they are a Medicare Patient. Can be part of when doing vitals and checking key Demographics.
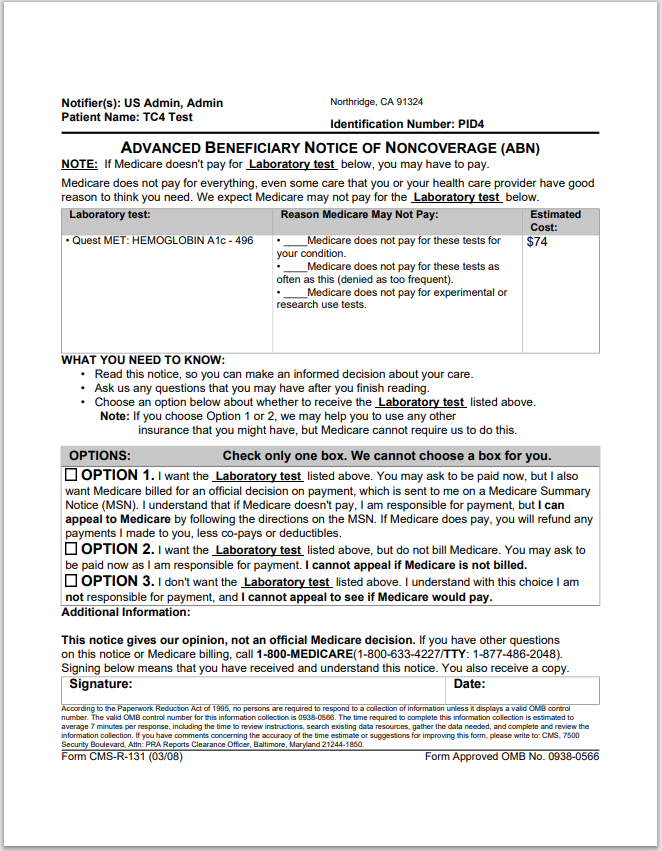
- ABN is given to all Medicare Beneficiaries for Lab tests that may not be covered.
- This is automatically triggered for all Medicare patients.
- Lab test in question is printed.
- Approximate cost is printed.
- Users must ensure ‘Medicare’ is selected in demographics.
- MA/Clinicians need to select one of the Options on the paper ABN form and request the patient to authorize.
- Copy can be made and scanned into a patient chart via Records Manager.
-
- $$ Consequence IF not done
- Patients will not be warned
- Billing may not be fully optimized or accurate
- Loss of revenue to Practice
- Patient Pay – Lab may Bill clinic
-
- Users must Actively Select if they are a Medicare Patient. Can be part of when doing vitals and checking key Demographics.
Processing and Monitoring #
- Linking DX
Face Sheet >CC TAB > DX TAB > ADD
Instructions #
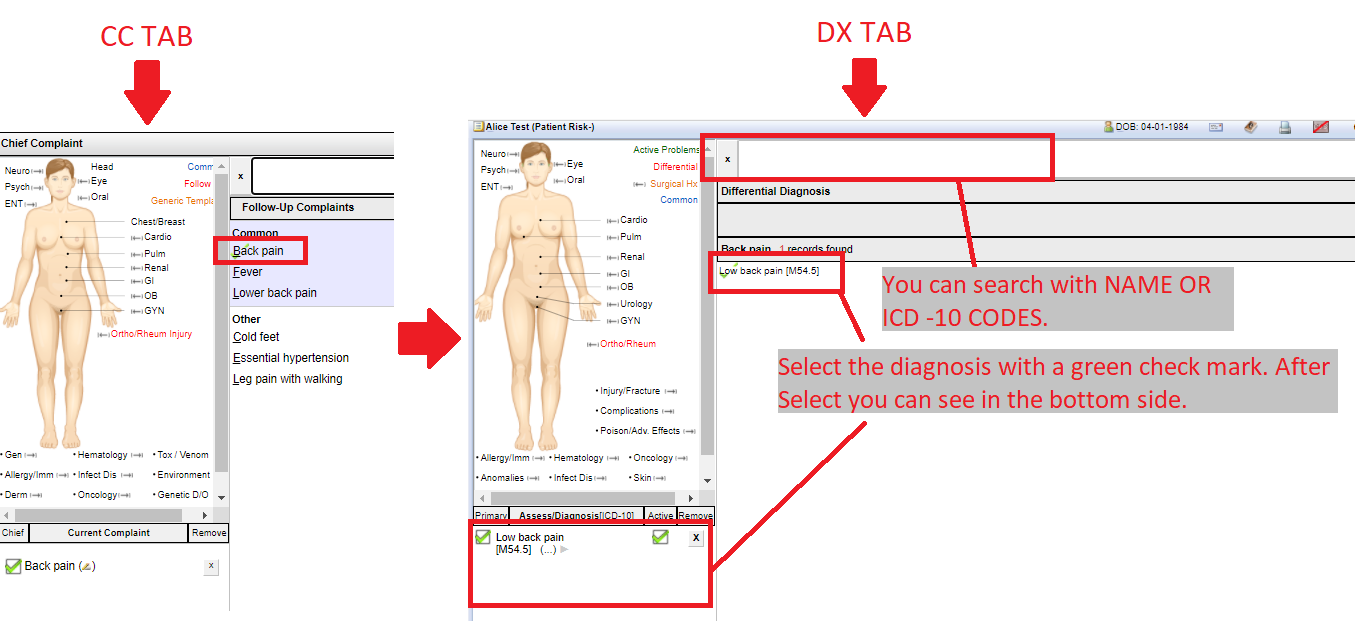
- Navigate to CC tab and select the chief complaint “Back pain”. And select the DX tab here you can see the diagnosis result will appear automatically which is mapped with what you have selected in CC tab. You can also select a direct diagnosis through the DX tab. Here you can search for a diagnosis by name or ICD-10 codes.
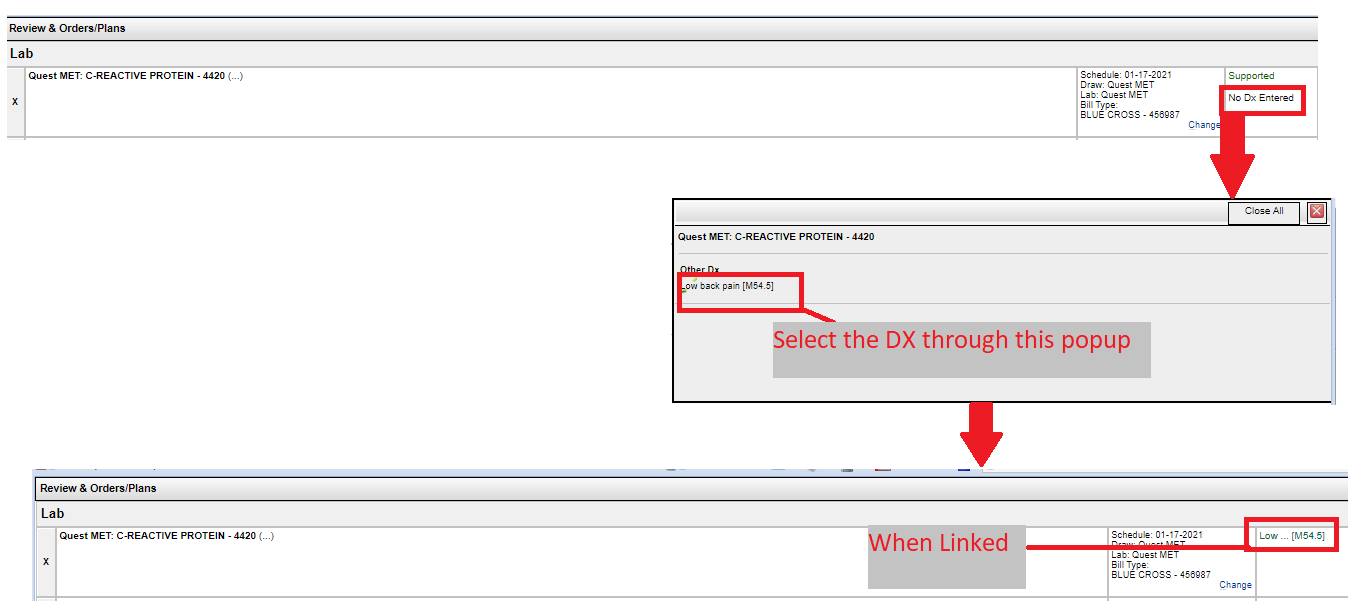
- Select the order through the Orders tab. Select the Review and Schedule Orders/Plans at the bottom of the page.

- Select the “No Dx Entered link”. Here you are able to link DX with appropriate order through the popup.
- Processing
Face Sheet > Orders tab > Review and Schedule Orders/Plans > Send for Processing
Instructions #
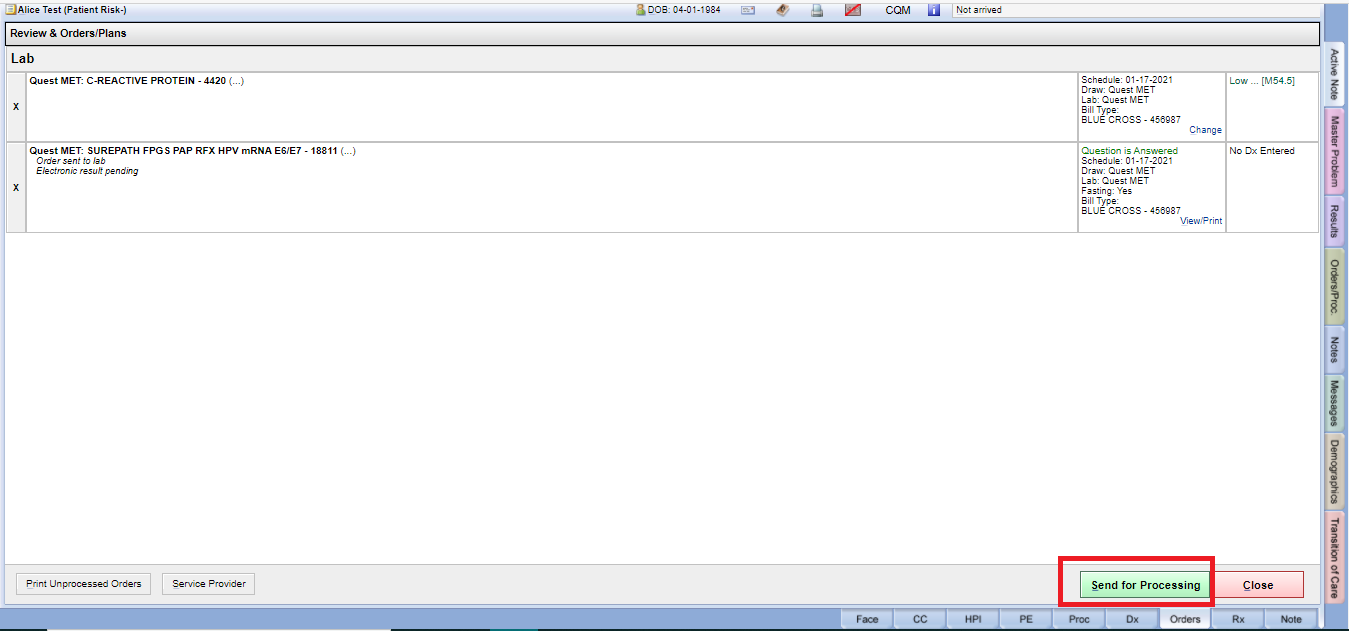
- Select the “Send for Processing Button”. Then orders have gone for processing which you have selected.
- Print Barcodes As Required To Attach To Specimen Kits
Face Sheet > Orders/Proc > View/Print
Instructions #
- After selecting Orders/Proc. you will see the Scheduled orders list in which you have previously ordered.


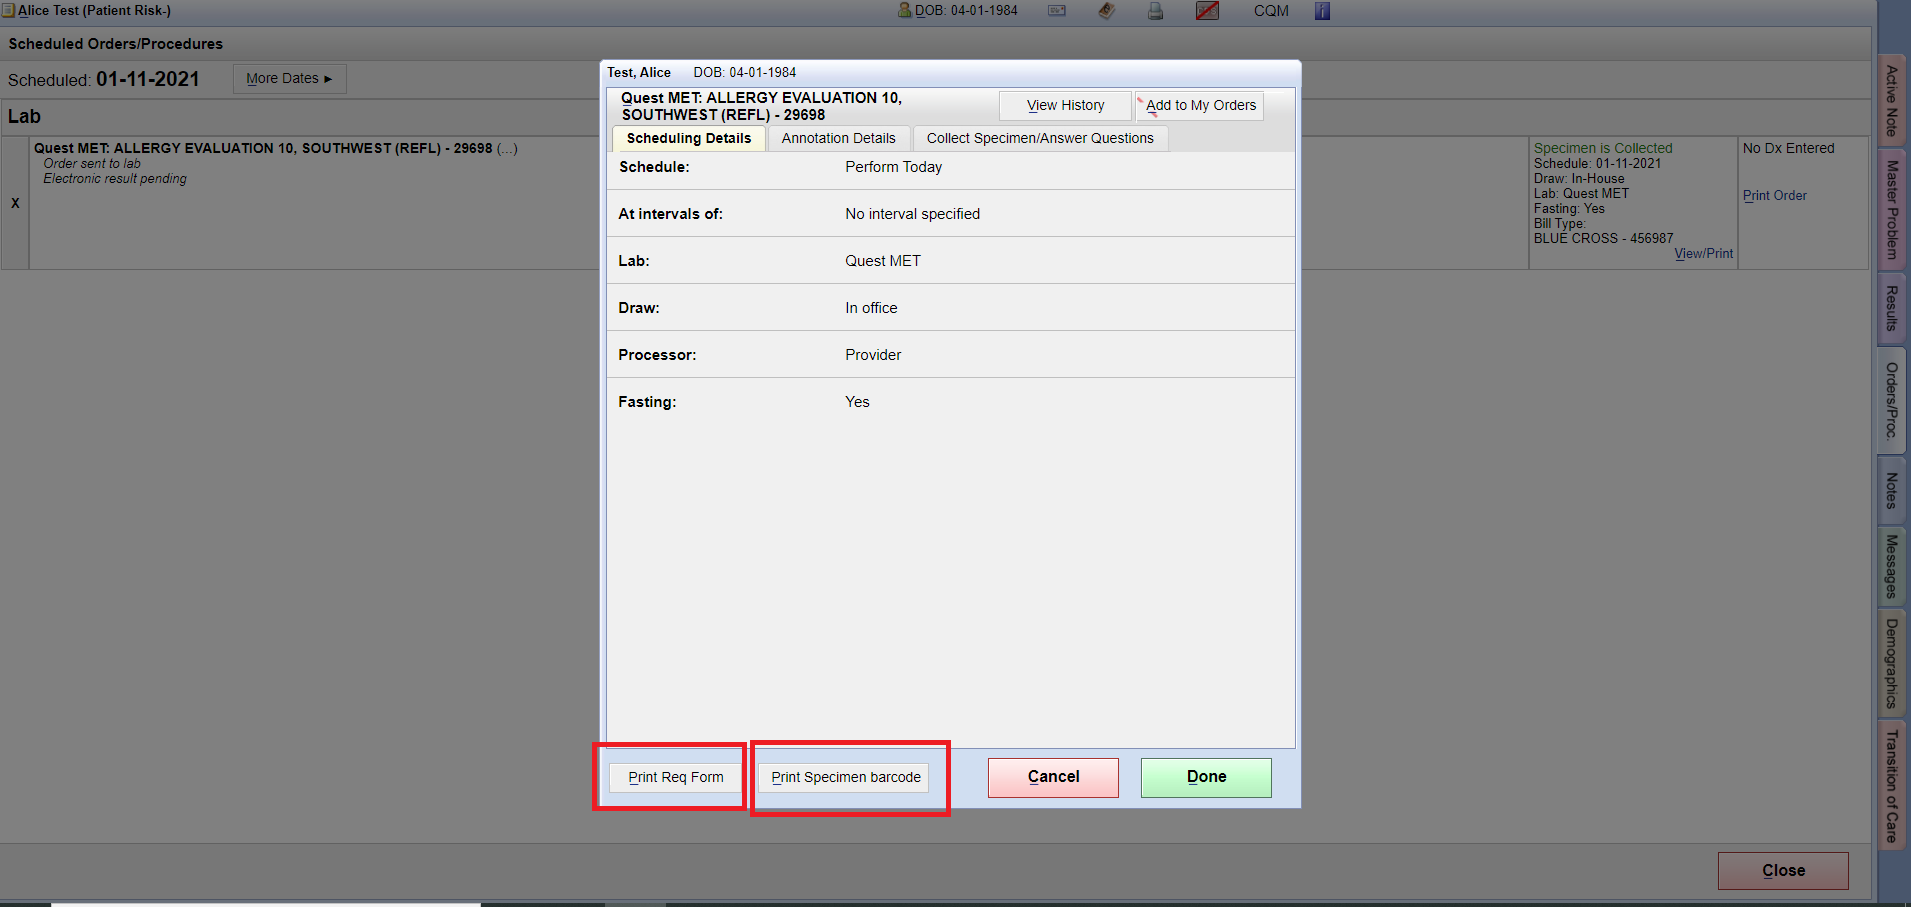
- Select the “View/Print link”. From here, you can print order barcodes to attach to specimen kits and documentation.
- You can print REQ with this window as well.

Print REQ. #
Face Sheet > Results tab
Instructions #
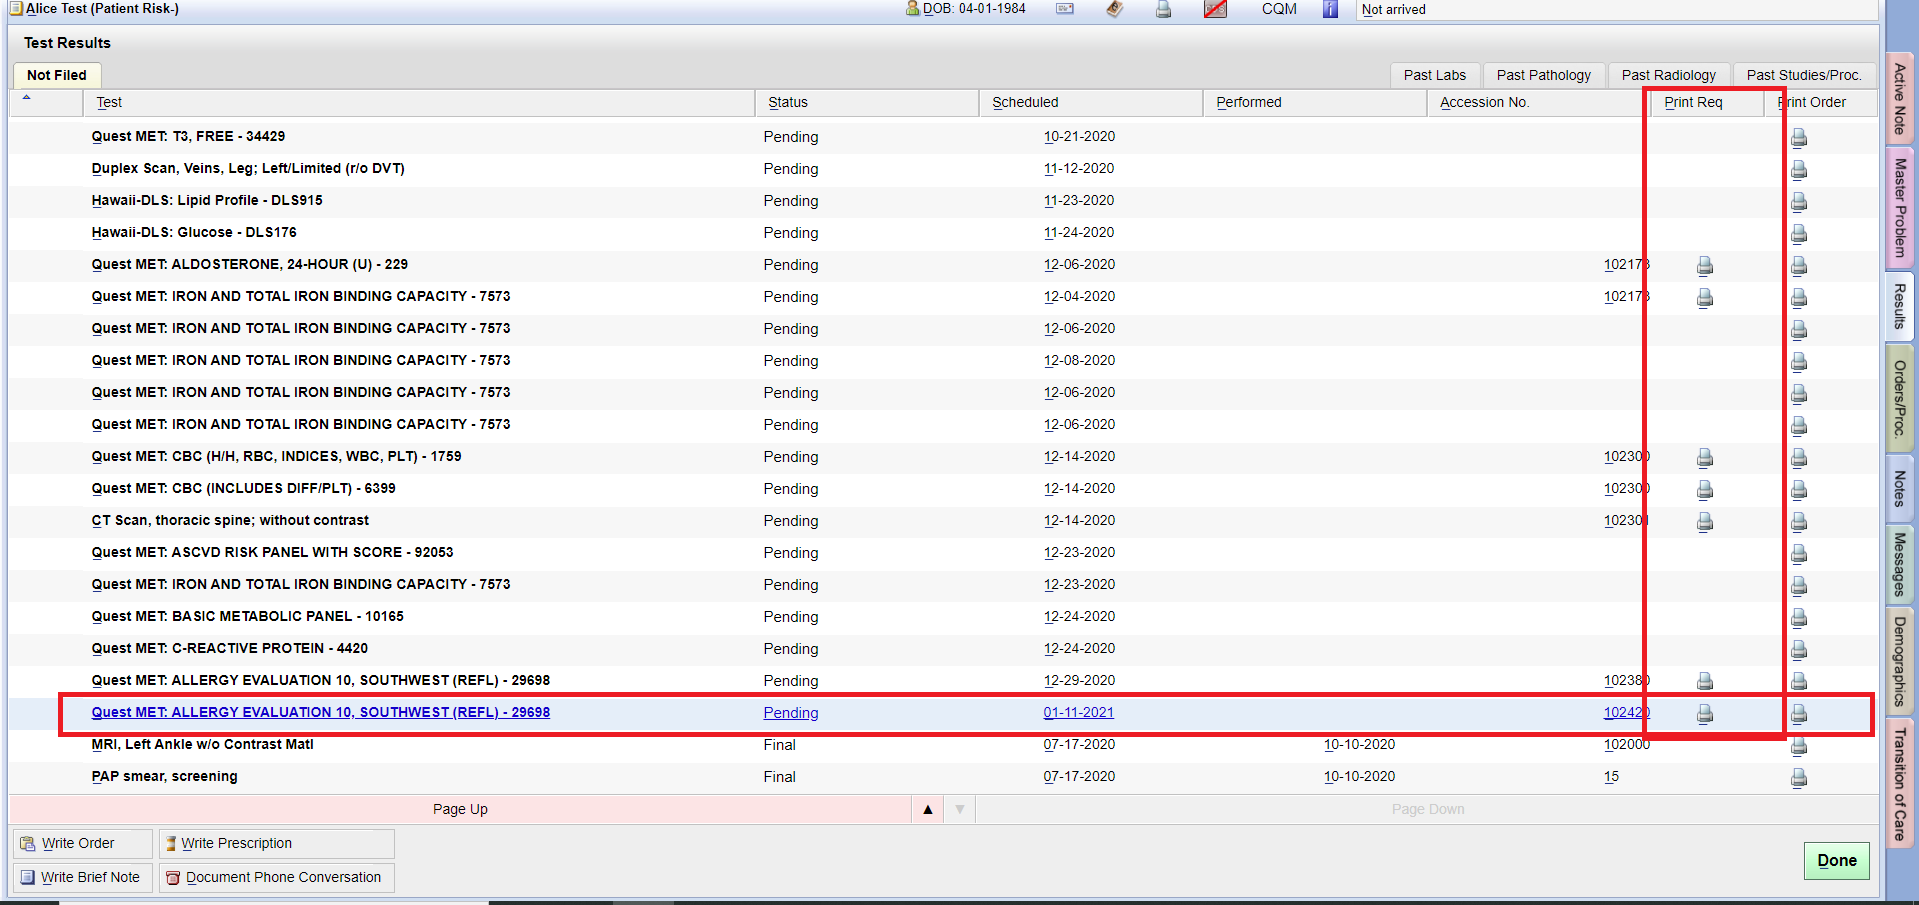
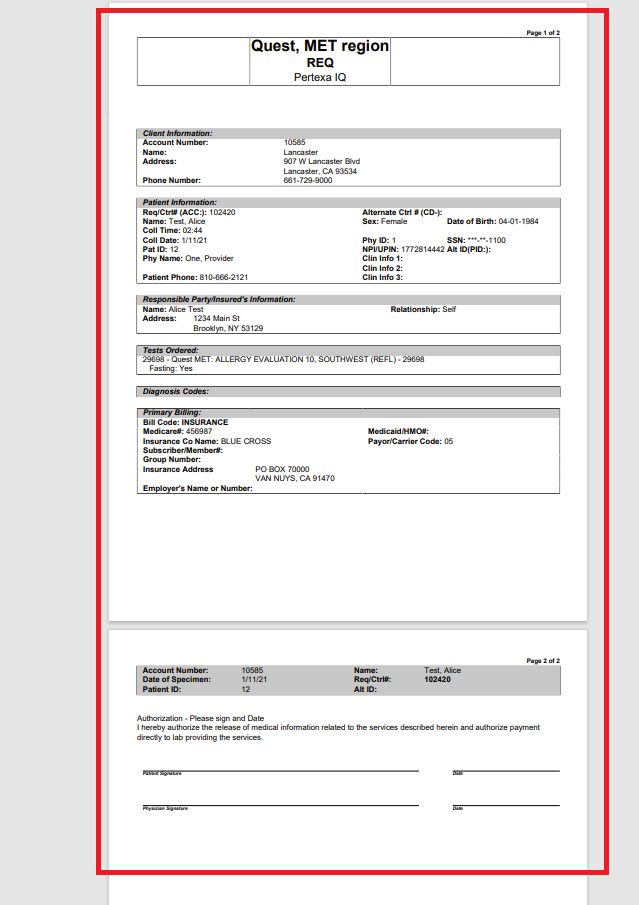
- Select which REQ you would like to print by clicking on the print button under the “Print REQ” select the right-hand side of the page.
Results #
- View Unlinked Test Result
Login into Records Manager > Unlinked Test Results
Instructions #
- Here you can see patient list which is containing the result and that is sent by Lab.
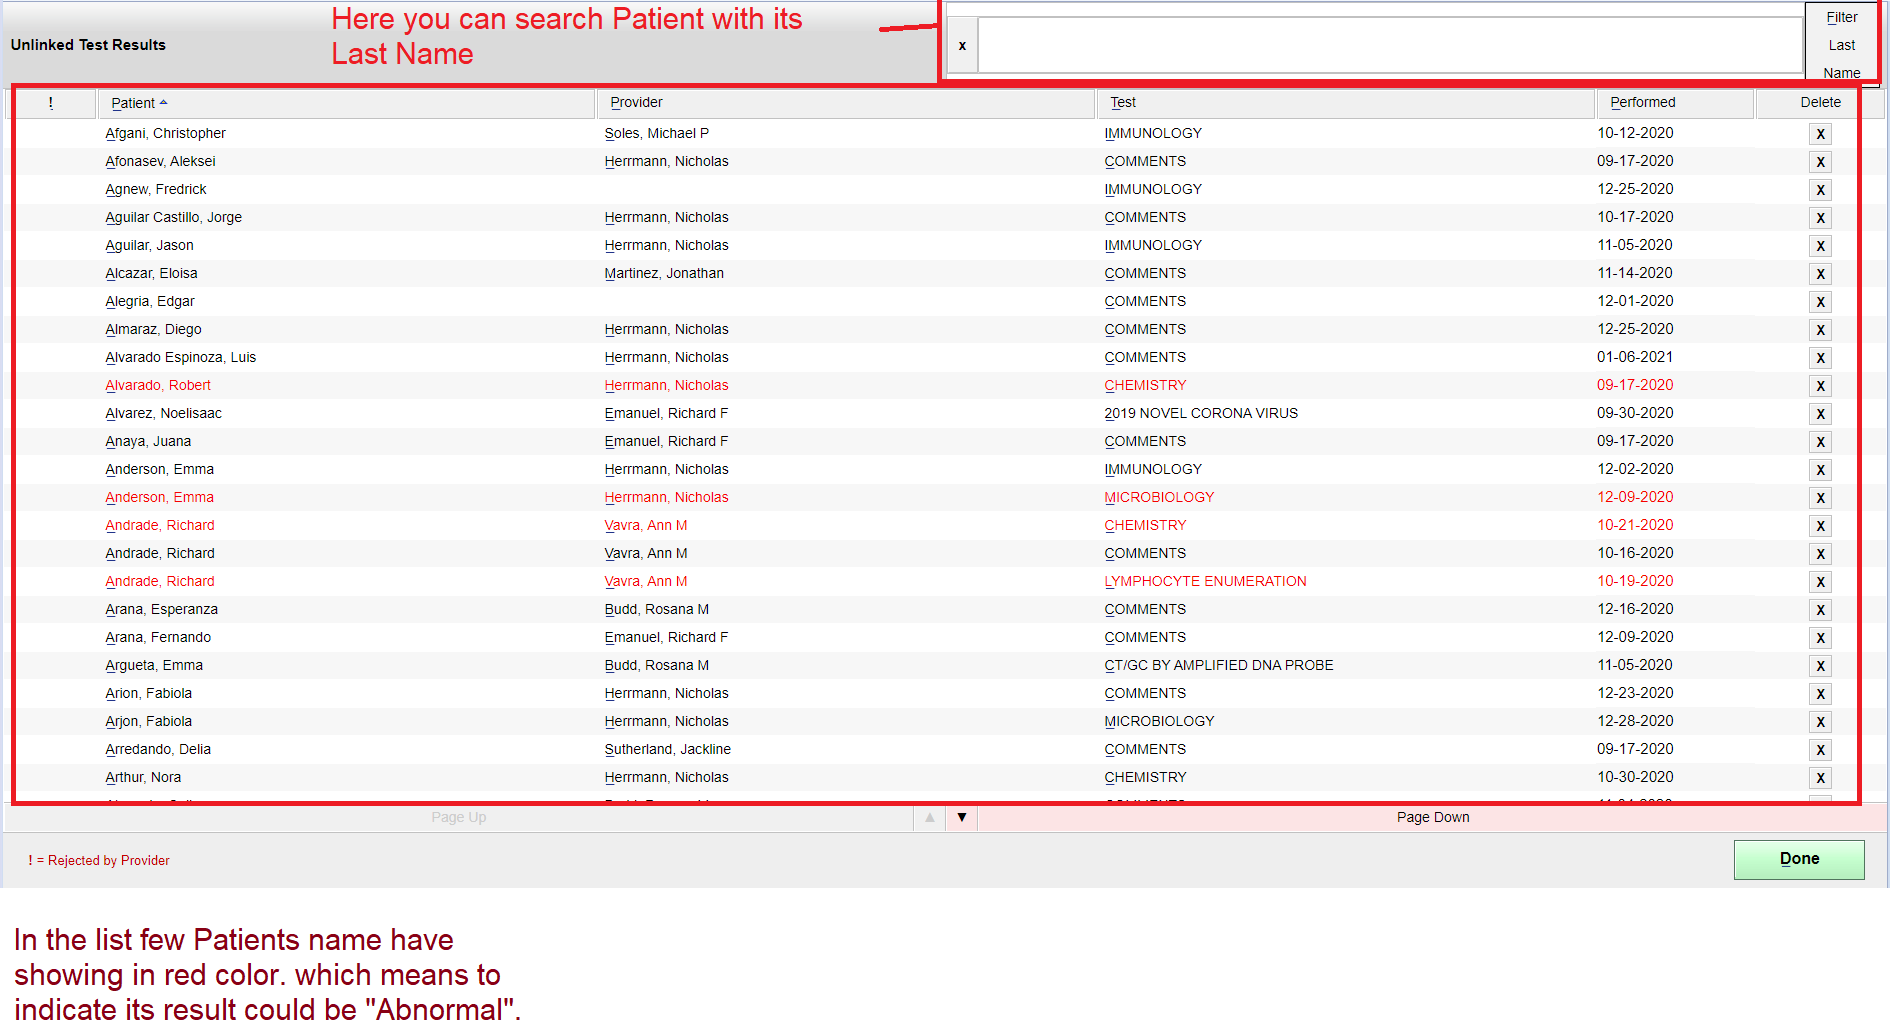
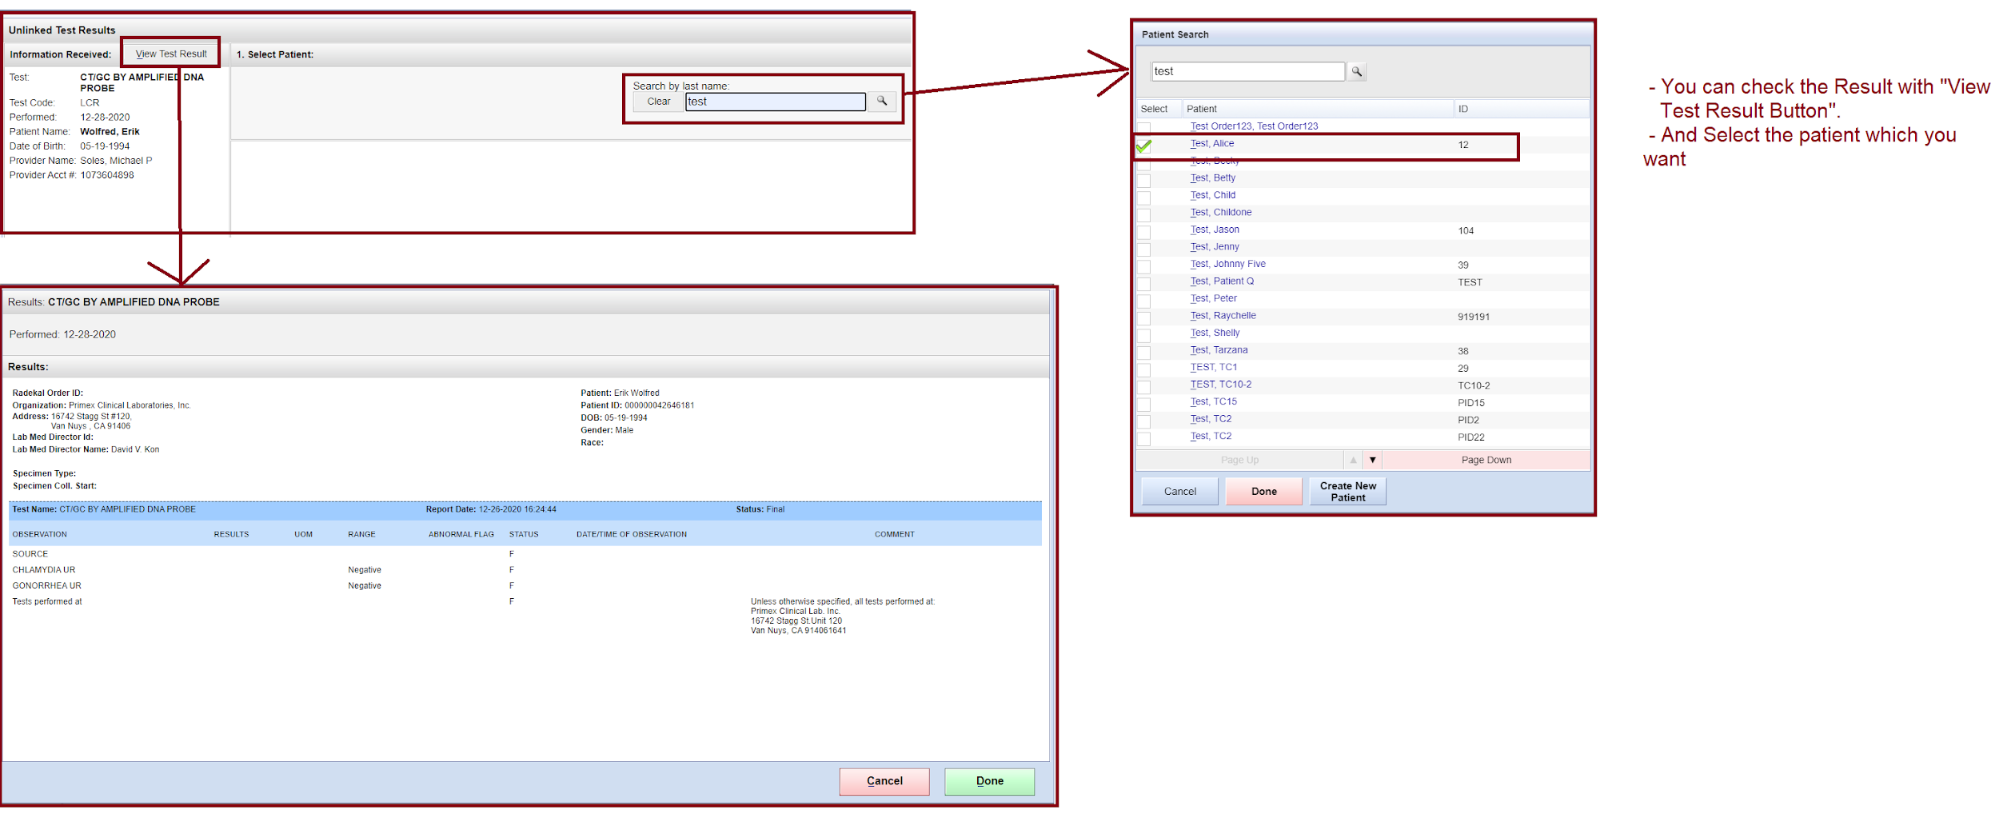
- Select the Patient name from the above list which you want to link with past orders. Here you can view the result and also you are able to link with patients past order. Select the “Done Button”.
- Tests to Review in the Docpad
Login into Docpad > Tests to Review
Instructions #
- Login into Docpad. Select “Tests to Review link”.
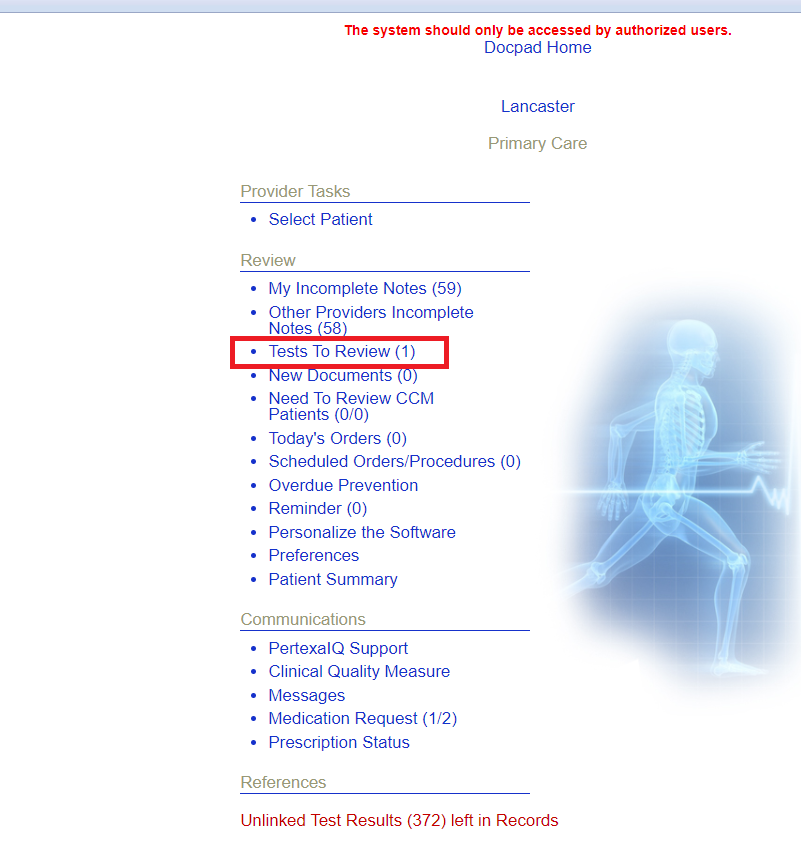
- Select the Patient which you had linked past order from the Records Manager module. Find the past order name and select. Here also you are able to print “manual print” and “print REQ”.

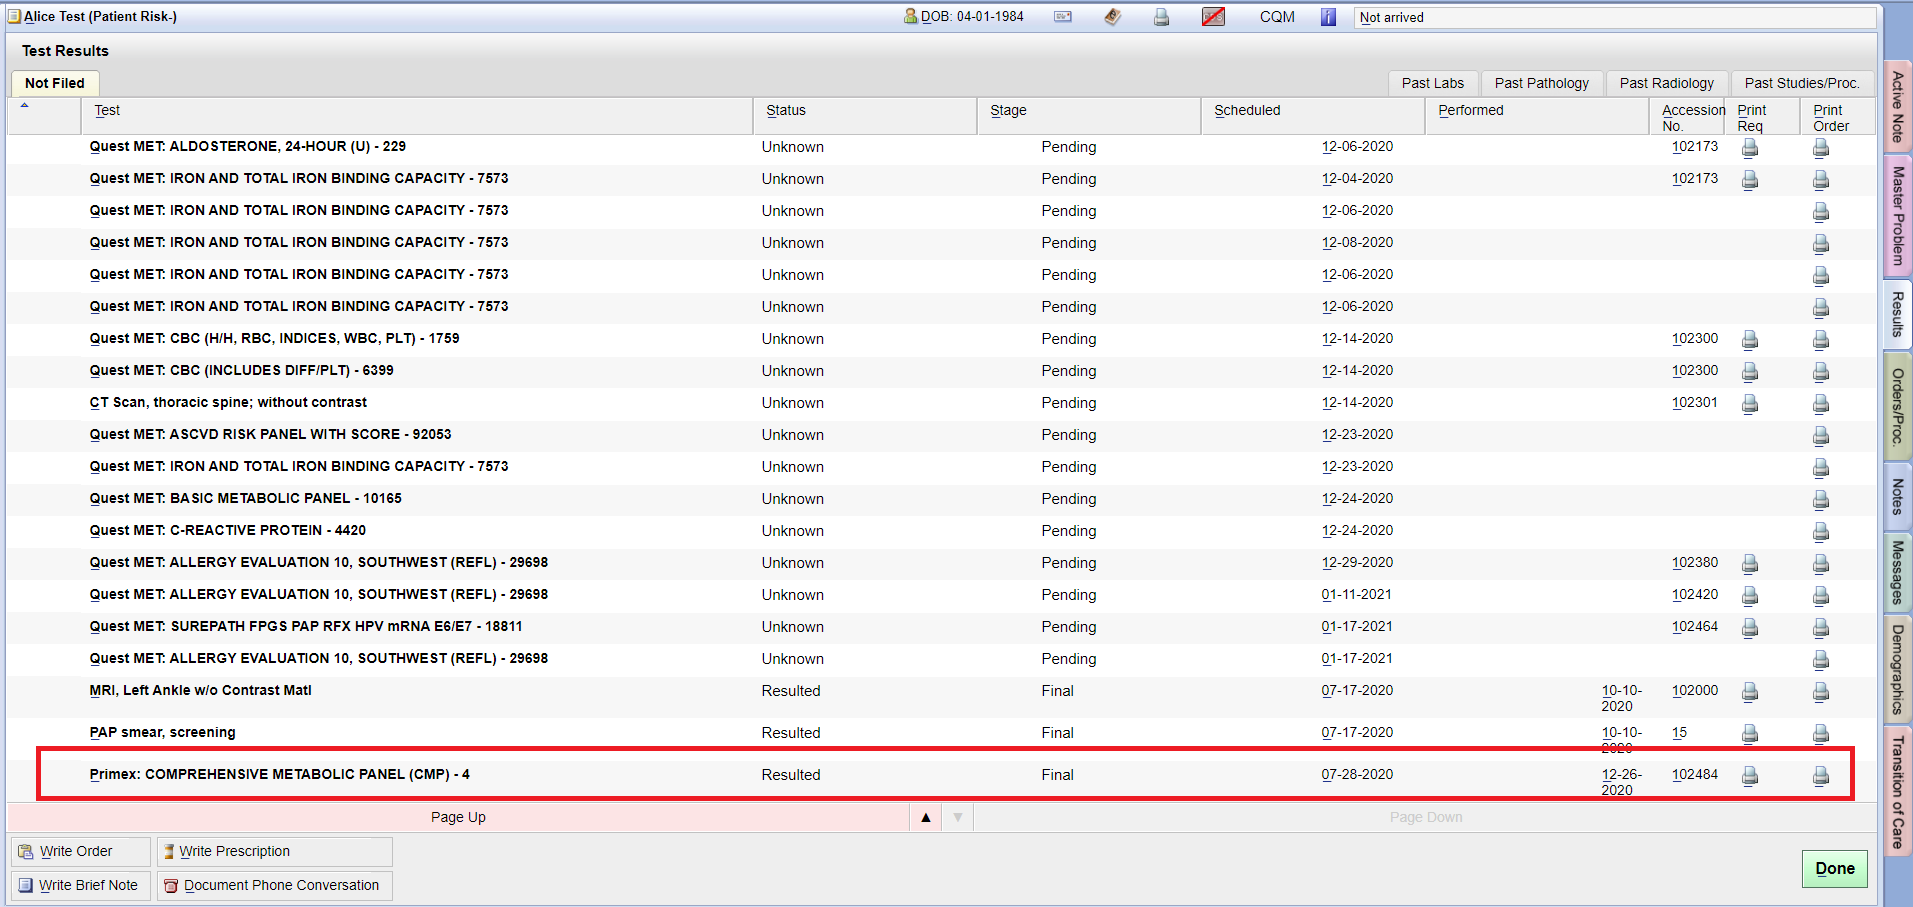
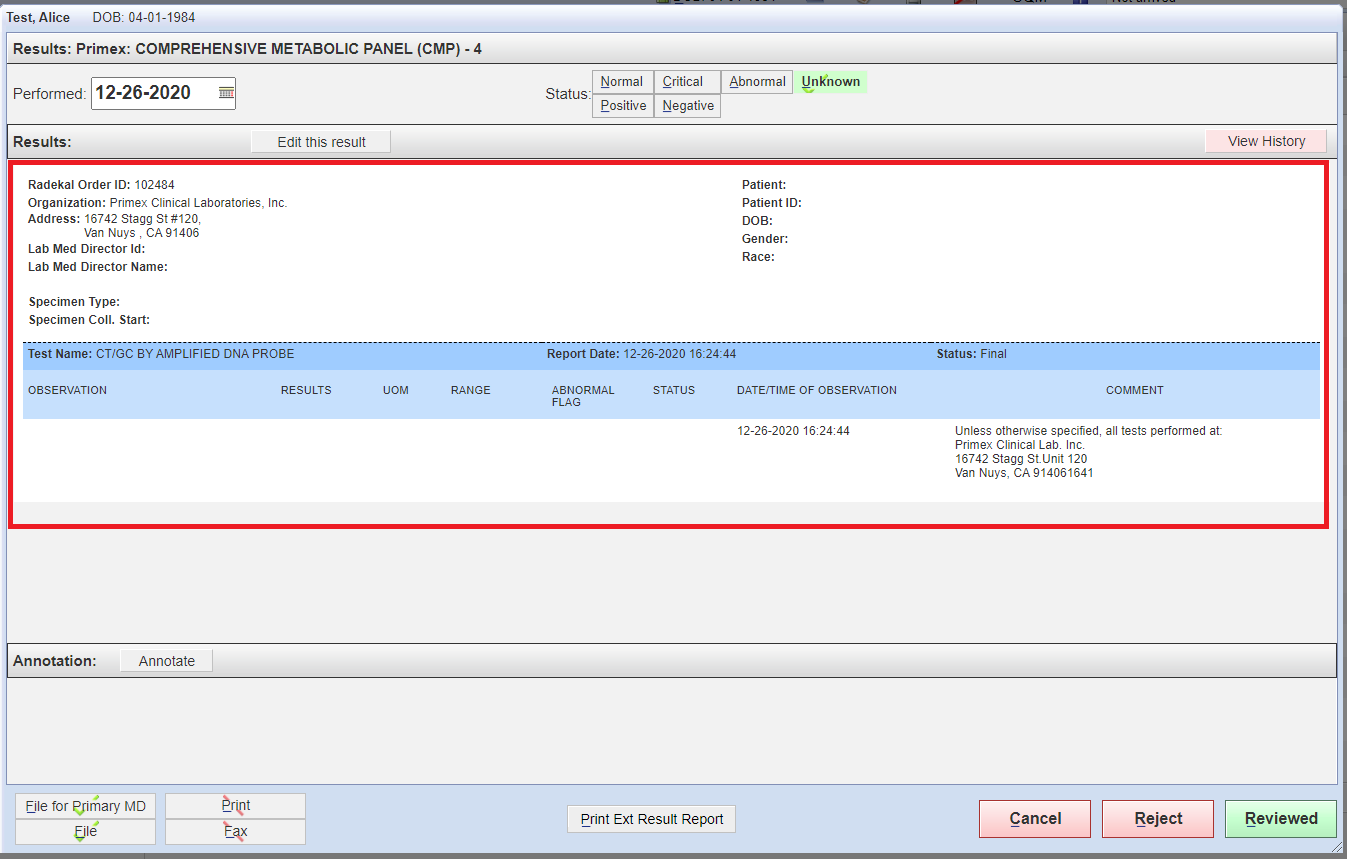
- Here you can Review or Reject this result.
- After Reviewed this result will go in the “Past labs tab”.
- After Reject this result will go back in the Records Manager module.


