Transfer Codes #
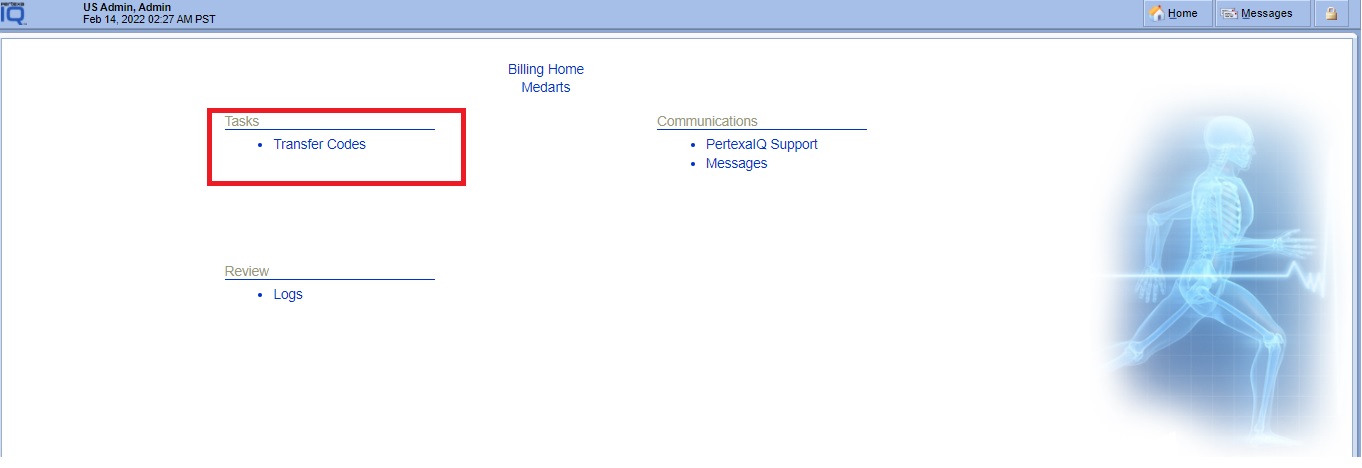
Login into Billing Module > Transfer Codes
Example Task #
You can do Make Bill for Individual Encounters who came from DOCPAD Module.
Instructions #
- Login into Billing Module and select Transfer Codes link.

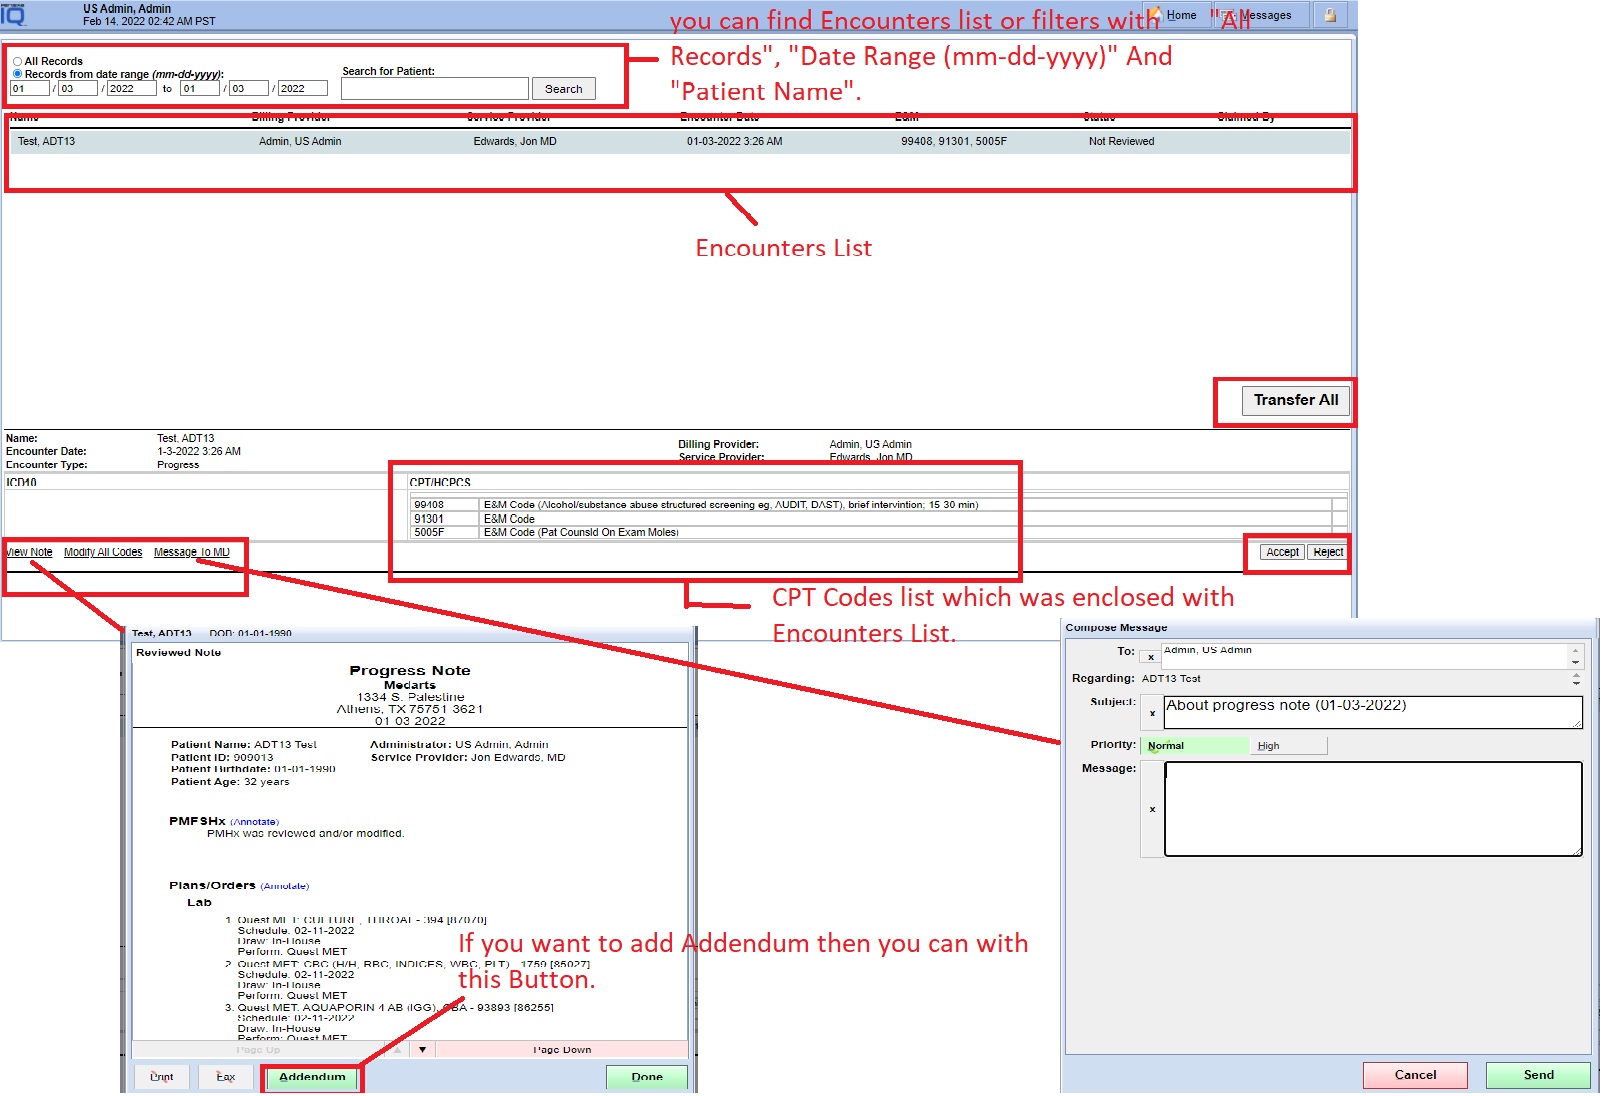
2. Here you can get Encounters which was signed from the DOCPAD. As well as you can find Encounters list or filters with “All Records”, “Date Range (mm-dd-yyyy)” And “Patient Name”.
– Here you can View Notes and if you want to add Addendum then you can with “Addendum Buttons”.
– If you want to Modify Codes then you can with “Modify All Codes” link.
– Also If you want to message to MD then you can with “Message to MD” link

Steps for How to works “Modify All Codes” functionality? #
- Select the Encounter and Select the below right – hand side – “Accept Button”.
2. select “Modify All Codes” link.
3. Here you can able to do Add OR Modify icd-10 And CPT Codes.
How to ADD or Modify icd-10 codes in Billing Module? #
- If you want to Add new one icd-10 codes then select “Add New” Button in icd-10 code section.
2. Type 2 – 3 characters for icd-10 then you will get automatic the list of icd-10 codes appear in one Pop-up. So you you can easily choose through the pop-up.

How to ADD or Modify CPT codes in Billing Module? #
- If you want to Add new one CPT codes then select “Add New” Button in CPT code section.
2. Type 2 – 3 characters for CPT then you will get automatic the list of CPT codes appear in one Pop-up. So you you can easily choose through the pop-up.

3. You have to marge icd10 codes with individual CPT codes.
4. Finally select “Done Button” below right – hand side.
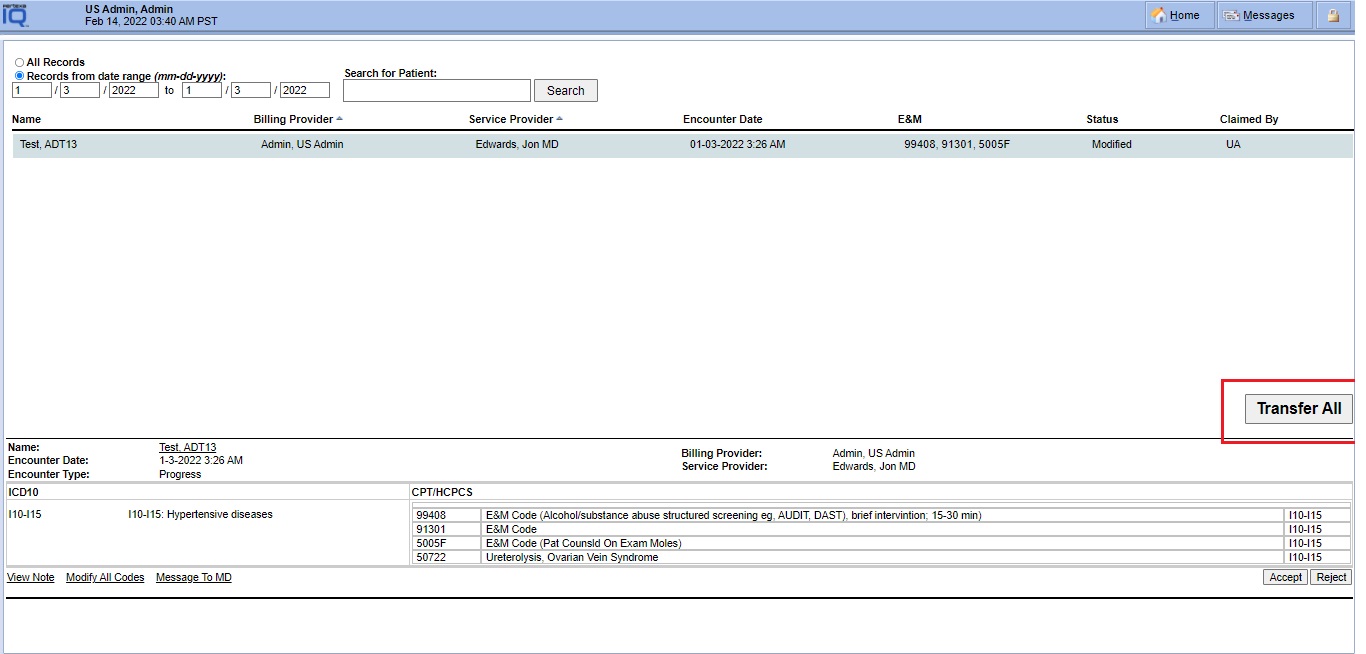
5. Select “Transfer All” Button. So it will go in Pertexa – PM system after selecting “Transfer All” Button.


